After my abortive first sail back in 2020, I had a small list of projects to accomplish prior to a second attempt. The first two were related: One of the trailer bunks is directly below the daggerboard trunk so reworking the trailer bunks to better support the hull and getting the boat up onto boat stands so that the daggerboard could be fully inserted were projects that went together.
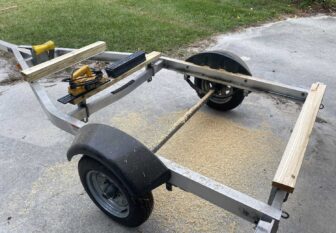
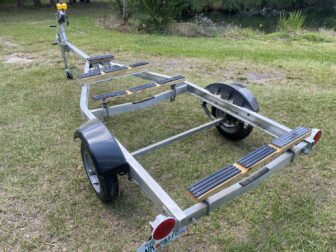
I got the boat up on stands and started with the trailer. I used the planer to shape the forward and aft bunks to more closely match the rocker of the hull, then used a router to cut notches for the runners. I replaced the bow roller with a small wooden pad and added plastic bunk slick pads to all the bunks. It took a few tries and a bit more trimming with the router and adjustment of bunk mounts to get all the bunks to contact the hull evenly. The small forward pad contacts the hull underneath the mast step. The next bunk back contacts the hull forward of the centerboard trunk. The next one holds it under the back end of the centerboard trunk and the aft bunk contacts the hull underneath the aft bulkhead.
The daggerboard and trunk had been damaged in a hard grounding at some point and I repaired the resulting nicks in 2020 but found that the daggerboard had a lot of friction against the trunk and would not go all the way down when I first sailed the boat. I guessed that my 2020 repair to the trunk might have left an epoxy booger or something that needed to be filed/sanded down. I also saw what I thought was a crack running most of the way up the length of the daggerboard. The actual answers turned out to be a bit more complicated.
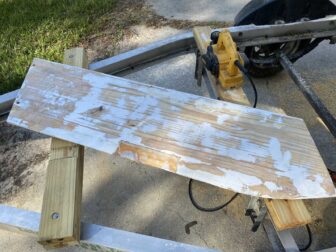
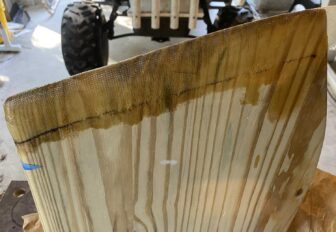
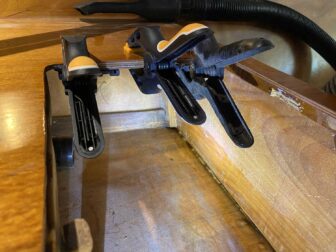
I got under the boat and looked up through the trunk and it looked just fine. No epoxy lumps or other irregularities that might bind up the board. Moving on to the daggerboard, I decided to just strip the whole thing, do something about the crack, and repaint it. I set my brother's planer to cut very shallow and started taking off the paint, shown in the picture at right.
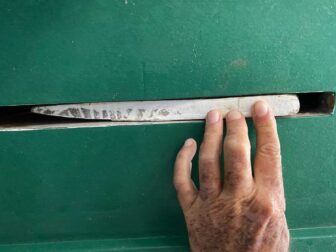
I found that the "crack" I had seen was actually a glue joint where the aft-most of 6 pieces of wood was glued to the one in front. The glue joint was fine, just not quite full, so it looked like a crack but was not. I also found that the top foot or so of the daggerboard was sheathed in fiberglass cloth. I also noticed that the board did not appear symmetrical. One side was excessively curved, the other was too flat. I asked about it on the Goat Island Skiff Facebook group and designer Michael Storer commented that the whole daggerboard should have one or two layers of fiberglass cloth to prevent this kind of warping.
The picture at left shows the problem. People in the GIS group suggested various methods of counteracting this warping but the simplest one was to lay it on the lawn overnight and let it absorb moisture from the grass. I did not think this would work but it was quite effective! The board still did not fit in the trunk and it had to fit with enough room to accommodate at least one layer of fiberglass, so I had some material to remove with the planer and belt sander. I looked in the GIS build manual and decided I was probably not competent enough to build and use a foil template to get the shape exactly right. I also saw instructions to coat the bottom of the board with two layers of diagonally-cut fiberglass cloth. I set about planing and sanding the board, rounding the bottom, and trying to compensate for the remaining warp in the wood. The planer grabbed and removed a couple of knots from the wood, creating voids that would need to be filled with epoxy putty.
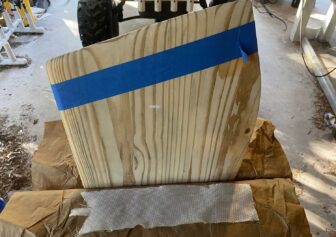
I cut a couple of diagonal bias pieces with the ends trimmed to wrap around the leading edge of the daggerboard.
Once the end flaps were wrapped in place, the front corner of the board should have at least a few layers of fiberglass and the rest of the tip has two.
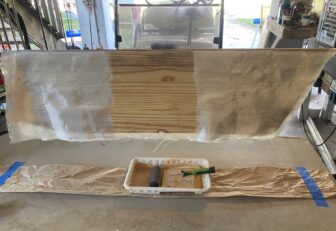
After the glass on the tip cured, I sanded it smooth with coarse paper then went over the whole daggerboard with 150 then 220 sandpaper to prep it for a layer of fiberglass. I put long deck screws into the top and bottom of the board to hang it while the glass was being applied.
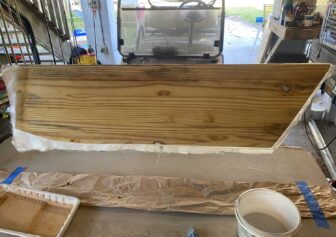
I interpreted the instruction to put "one or two" layers of cloth to mean one is fine. The leading edge wound up with a couple of bubbles so I cut those out, smoothed it down, and epoxied a four inch strip of glass cloth around the leading edge. After it was all cured and sanded, I checked one more time prior to painting. Yes, it fits in the trunk nicely now. I put the boat back on the trailer but have to lift it back off one last time to glue a couple of pieces of carpet to the back edge of the trunk as an impact cushion.
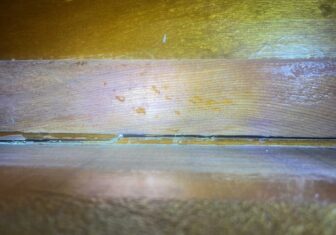
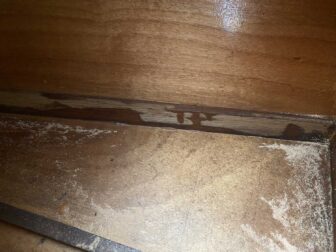
When I capsized the boat, I saw bubbles vigorously coming out of the aft buoyancy compartment from at least two places. I figured I might install a hatch in that compartment to access it from inside and find and repair the leaks without disturbing the varnish on the outside. On closer inspection, I had a much more serious problem than I thought. The entire bulkhead support had broken free from the bottom of the boat from one side to the other in what must have been some kind of impact event. This wasn't a bonding failure. It tore the wood apart in places. What happened remains a mystery, but after consulting with the brain trust in the GIS group, I decided to dig out the crack a bit with the saw blade on my Fein Multimaster and then repair it from both inside and outside.
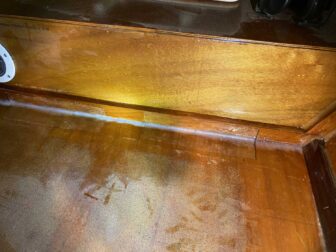
On the front side, I spread liquid epoxy around the area, pushing it into the crack with a brush, then ran a fillet of epoxy with structural filler along the seam, again pushing the putty into the crack. I had a couple of scraps of diagonal bias cut glass cloth left over from the daggerboard job and laid them over the crack to further reinforce it. I cut one of them on the wrong side of the Sharpie pen line, so now a black line is a permanent part of the boat. Oh well, it's not the only cosmetic flaw on this Goat!
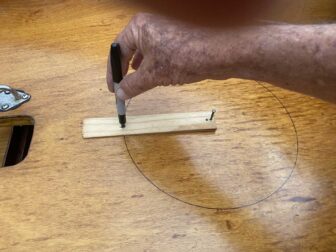
To access the buoyancy compartments through the seat tops, I bought a 10 inch round Armstrong deck plate for the bow compartment and a 10 by 20 inch rectangular plate for the aft one. Starting with the bow one, I used a scrap shim to draw the circle for cutting.
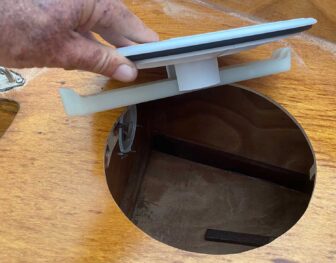
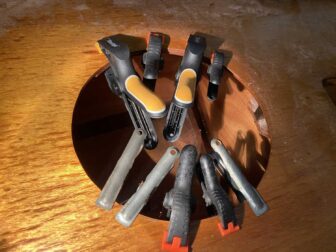
The Armstrong plates have no hatch frame. They sit directly on the smooth deck and are pulled tight by clamps that underhang the deck edges. The picture at left shows test fitting the 10 inch circular plate in the bow compartment deck.
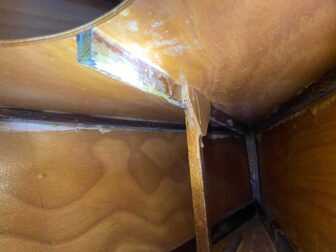
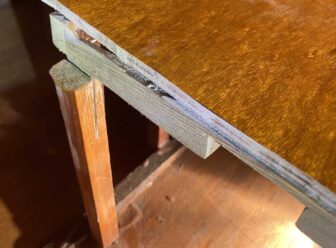
Cutting out the deck for the forward hatch resulted in slicing through a reinforcing stringer that runs down the center of the deck. The Armstrong hatch relies on the deck being stiff to maintain a good seal. It was still stiff along its aft edge, where it was near to the bulkhead, but was too flexible along the port and starboard edges and at the front edge. As the picture at right shows, the nearest vertical support was almost a foot forward of the hole, too far to keep it stiff.
I used some scraps to create another vertical column near the edge of the hole, copying the design of the existing one.
I cut up the round piece of plywood that was removed from the deck to make two crescent-shaped pieces and epoxied them to the underside of the hatch hole edges to stiffen it along the sides.
Opening up the compartment revealed the the hull stringer along the starboard side was never sealed in epoxy, so while I was sanding and epoxy coating the bulkhead edge to seal any leaks I also coated as much of it as I could reach. The forward compartment did not take much water in the capsize and may have leaked through the four inch round hatch beside the mast step, so I'm not really sure the bulkhead itself needed sealing but I figured it couldn't hurt. In any case, if this compartment leaks a bit in a future capsize, it will be easy to clean and dry it out.
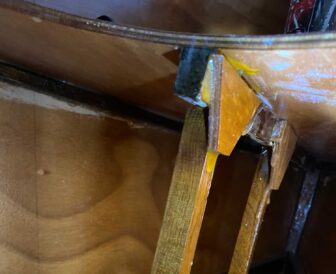
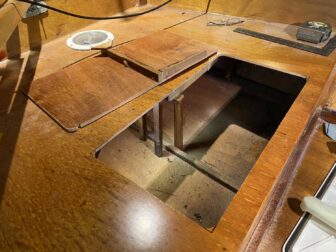
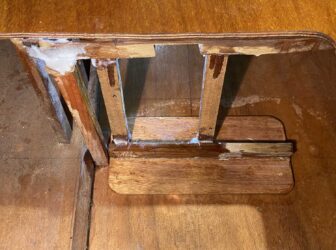
After sticking flashlights, measuring tapes, and a camera through the four inch deck plates in the aft compartment repeatedly, I decided that I really could not accurately measure the positions of the structural pieces under the aft deck so I just needed to cut a hole and repair the resulting damage. The picture at right shows the result. My jigsaw blade sliced deeply into a vertical support piece and carved a wedge off a lateral one.
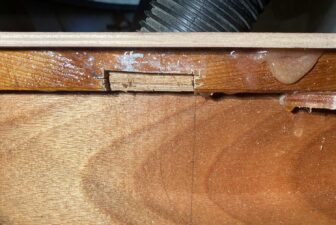
The rectangular deck plate has two underhanging clamp arms and I had to cut a notch into the already weakened lateral support piece to allow the hatch to slide into place.
I had to cut notches into the seat support for the forward ends of the hatch clamps, and also had to trim down the clamp ends a bit.
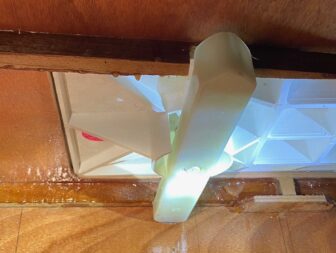
The aft hatch installed and clamped down.
I cut the scrap piece that was removed from the aft seat into three pieces. The end pieces were used to double the thickness of the sides of the hatch opening, with extra epoxy used to start sealing the plywood edges.
The center piece of scrap wood was epoxied to the bottom of the boat to anchor two new vertical braces under the seat. Extra epoxy thickened with structural filler was used to repair the cut made by my jigsaw in the existing vertical support. After that cured, I cleaned it up and coated all the exposed wood with liquid epoxy.
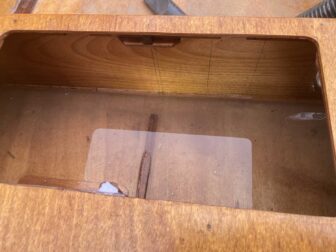
After everything was sealed I decided to test the water tightness of the bulkhead joint by filling the aft compartment with some water. I let it sit for a bit and no water appeared on the other side, so it passed that test.
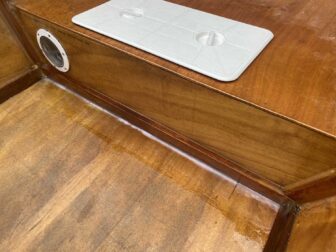
I got the bulkhead repair cleaned up on the front side and put a coat of varnish on it. The whole boat needs several more coats of varnish, but at least it's ready to put in the water now.
Leave a Reply
You must be logged in to post a comment.