August 31, 2011
More Test Laminations, Removing Gussets, More Deck Skin Removal
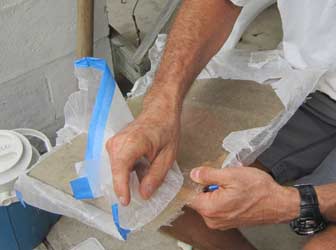
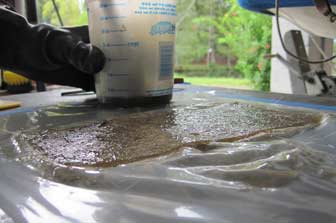
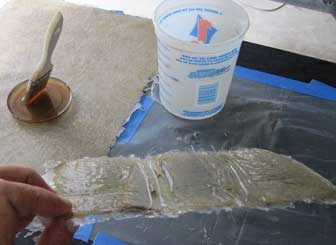
We decided today was the day to find out more about using wax paper as a release layer under fiberglass laminations. As noted back on page 4, the test sheet that had styrene monomer "Sanding Aid" in the resin mix fared a bit better than the other one when it came time to peel away the wax paper. It came off nearly intact, but still left some pieces of wax paper firmly stuck to the fiberglass. In the picture at right, the bulk of the wax paper that appears to have come up easily is actually the part that was overlapping the wax paper that is still stuck to the sheet. The lesson learned was that "Sanding Aid" helps a bit with releasing the paper, but not enough to matter. We still had a paper removal project ahead if we took that approach.
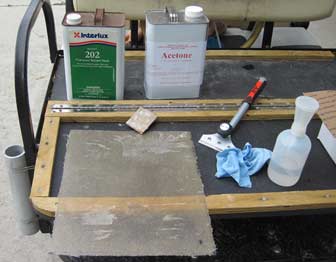
Wondering just how long the wax paper removal process might take, we considered a few approaches for removing it. We did not have a heat gun, and figured that would take too long anyway, so our first thought was to try combined physical and solvent attacks on the problem areas. We learned that Interlux 202 solvent and Acetone have essentially no effect on bonded-on wax paper, that sandpaper quickly loaded up with wax, and that a razor scraper was just ineffective because the surface to be scraped was not smooth enough. Because we combined these methods in various ways, I'm not really sure how many strikes that is, but it is obviously more than three, so we were out! The only one that would ultimately work was going to be sanding all that wax paper away and then using solvents on the residual wax, and it would simply take too long to be worthwhile. We had to find a new plan.

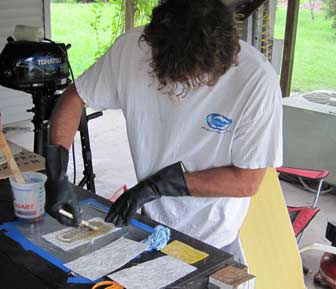
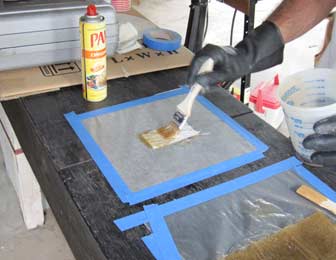
We decided to try a test lamination of three sheets of mat using a piece of "Film-Gard" 6 mil plastic as a release barrier. First, the plastic was stretched tight on the work bench and taped in place to keep it under tension and smooth. The pieces of fiberglass mat were then layed on the plastic and soaked with resin using a brush. It seemed to go well for the first sheet, shown at right, but things went downhill from there.
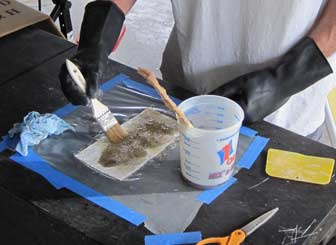
By the time the third sheet in our little layup was being wetted out, it was pretty obvious that we had a serious problem. The plastic sheet was no longer stretched tight on the bench, and it appeared that the plastic was actually expanding a bit where it came into contact with resin. Perhaps it was soaking up a bit of the resin, or maybe we had just bonded plastic to our lamination in a way bound to become a gooey mess. We did not know, but we were certain by this point that the technique would be a failure if we tried to use it to create 7 by 9 foot sheets for the hard tops.

The picture at right shows just how badly the plastic was wrinkling when put in contact with resin. That piece of plastic started out stretched smooth over the work bench, and it actually wrinkled up enough to lift the test laminate sheet up, allowing air to pass underneath. Obviously, this technique is a complete failure for making large sheets for hard tops. Gene was pretty bummed about this result and was starting to think that maybe he should just buy some sheet fiberglass online. I was not quite ready to give up on the idea of making our own hard tops for the boats.
My focus shifted back to the wax paper technique. It had worked, or at least come close to working. At least it produced smooth, usable sheets of fiberglass. The problem was that the wax paper stuck.
We had a little resin left in the pot, and I talked Gene into doing one more test, this time with a little Pam cooking spray on the wax paper to help it release when the fiberglass cured. We were not sure how the Pam and the polyester resin would interact, but figured that a tiny amount of Pam would probably be OK. Once the sheet of wax paper was taped in place, I just sprayed it with a bit of Pam and then wiped it off with a paper towel, leaving no visible residue but some very slick wax paper. Gene soaked a few pieces of mat on this test substrate, then we left the pieces to cure.

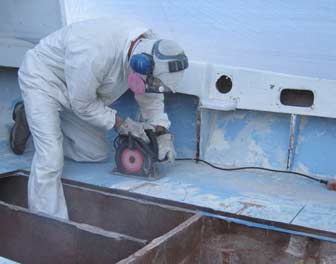
Gene heard back from Privateer that the gussets along the sides of the boat are not needed; they were part of the structure of the seats, not the sides of the boats. Refinishing the interior of the boat will be so much easier with them out of the way! The area being difficult for a sawzall, he cut away the tabbing with a grinder to break them free.
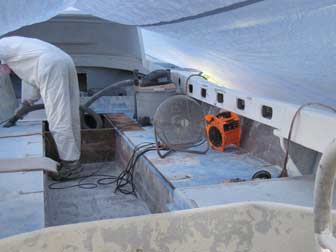
The gusset up by the orange squirrel cage fan and the one that is barely visible in front of the console both had to stay because they help support the top frame legs.
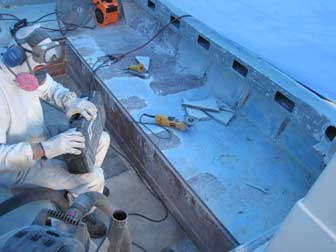
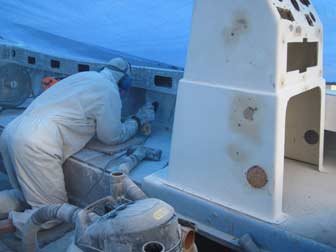
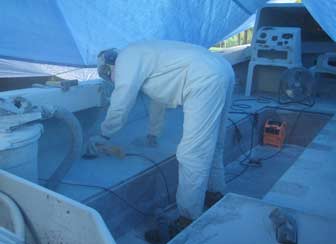
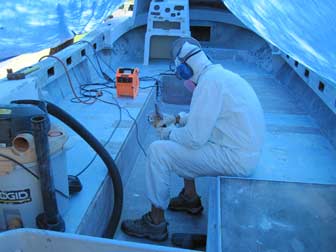
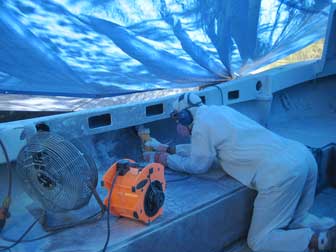
Removing the last bits of gusset tabbing and the various layers of finish was a dusty business, and Gene had the area set up to control it as best he could. Two fans and the grinder itself made all the dust tend to fly out to the right, where the running shop vac sucked up a fair amount. The console is sitting on bare plywood, but it looks like the deck is covered in snow.
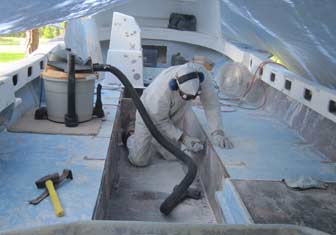
At one point I approached the boat and saw Gene apparently shop vaccing his face. When I got a little closer I could see that he was using the shop vac to clear out his goggles, which were condensing water. It was very fast and effective, and cooled and cleaned his face off a bit too.

After the gusset stumps were ground off, the whole work area on Fluke was cleaned with the shop vac. There was an impressive amount of dust inside the canister. The filter looked like an enormous and slightly bluish cotton candy ball.

With Fluke cleaned up and half a day ahead, our attention turned to Pec. As mentioned previously, there was a rotten section of plywood deck core up forward on the starboard side, and there had been signs of trouble in the core of the driver's deck as well. It was time to remove the skin from those areas and see what was really underneath.
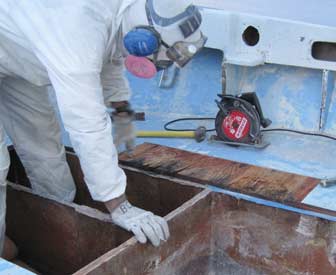
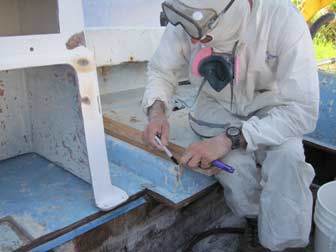
Tapping and feeling, I found two small areas of delamination and marked them with a Sharpie. Gene then marked out a large rectangle surrounding those areas and went to work with the circular saw.
Prying off the deck skin revealed the rotten areas of core, which were a bit smaller than I had expected based on sounding the area. It will not be hard to replace this section of plywood, and the rest of the deck sounds and feels OK.

The driver's deck on Pec had shown evidence of water intrusion when we removed the console, so the skin had to come off to assess and dry out the core.
With the skin removed, we found the core to be water stained but not particularly wet to the touch. Tapping it, it was fairly consistent across the stained and unstained areas.

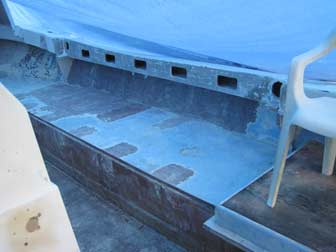
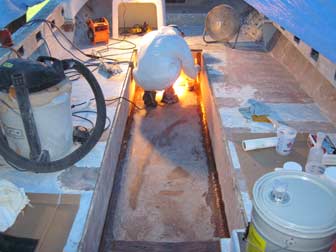
By the end of a long day, Gene had all the gussets cut off the sides of Pec and the sides ground back to smooth fiberglass. The freshly exposed core in the foreground is white with dust. Once that was removed with the shop vac, the plywood core felt dry to the touch.
The pieces of fiberglass created earlier in the day had cured up. The test piece with the Pam was a success. It peeled away from the wax paper easily, and did not seem affected in any way the the Pam. I think it will work to create the large sheets for the hard tops.
The more interesting piece was the lamination made on a piece of plastic. The wrinkles made interesting patterns in the underside. I think that if I stuck this to the captured paint brush in the background, it would be a heck of a nice piece of boat construction art!

September 5, 2011
Grinding Fuel Tank Compartments and Hull Topsides
The grinder got a real workout today, with Gene grinding out the fuel tank compartments on both boats. The plan is to put a fresh layer of fiberglass in each of these compartments before the new fuel tanks are installed. They are not particularly smooth and both took a bit of damage in the process of tank removal, so a fresh layer of glass will smooth and reseal them.
When the grinding disk is worn out from grinding out the tank compartments, Gene finishes it off by taking off some of the non-skid deck surface. That non-skid is hard on grinding disks and will turn one that is almost worn out into trash very quickly, but at least it is not wearing out fresh ones.

The grinder and shop vac running on Fluke were making so much noise that I was unaware that our friend Steve was around on the other side of Pec sanding the topsides with the orbital sander. I went to walk around the corner of the boat and almost bumped into him.
Steve got the port topsides of Pec sanded down before he had to leave, and both fuel tank wells were nearly ready for a fresh layer of glass by the end of the day.

September 6, 2011
New Fuel Tanks, Attempted Grinding, Near Disaster
Gene and Steve returned from Marine Surplus in Fort Myers with the new plastic Moeller fuel tanks in light rain this morning. Radar already showed quite a few showers around, and the day had not begun to heat up. The tarps keep the boats dry in light rain like this, so sanding and grinding can proceed as long as no heavier storms show up.
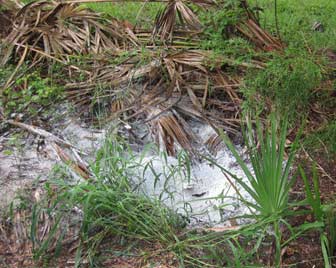
The rain helps tamp some of the dust down, and it is about the only time to approach this area. There was an unwanted cabbage palm here, so I dug it out with the backhoe and tossed it aside, leaving a big hole. Gene has been using this hole to dump the dust out of the shop vac and its filter.

Gene and Steve got suited up to grind and sand and made a little progress before the heavy rain arrived. You can't grind or sand with flowing water, so it was time to put away the tools and pull the tarps in to storm mode.
One task that could be done in the rain was test fitting the fuel tank to help visualize how we will modify the tank well and secure it. These new 82 gallon crosslink poly tanks are not as long as the old aluminum ones were, so the tank compartments will need to be modified to fit.

I do not have the camera or the reflexes to take a picture like this one intentionally. Just after I hit the button, Steve slipped out of his wet shoe and his leg went right down the hole all the way into the bilge. If he had not dropped the tank and caught himself with his arms, he probably would have broken his lower leg. As it was, he got some nasty scrapes and bruises.
At the bottom of the picture at left, you can see Steve's toe with an ice pack on it. We were debating where to place the tanks. If the center of gravity of the boats is to remain the same, they need to be in the middle of the tank compartments. That was going to mean a pretty sharp S turn for the fill hose, while moving it forward to the position shown would allow a straight run out to the side of the boat.
The change in center of gravity caused by moving the tank forward is about the same as a couple of passengers moving from the benches to stand at the hard dodger, something that takes place regularly in practice. When we were watching a group of Pan Tropical Spotted Dolphins playing in the bow wave out on the Silver Bank, everyone aboard was up forward and the boat handled it fine. If anything, I thought the boats looked a bit stern heavy when empty, so I think moving the tank forward will help a little bit.

September 9, 2011
Fillets in Fluke Fuel Tank Compartment
The fuel tank compartment on Fluke needed a bit of touch up grinding before they were ready for new fiberglass. The corners are a bit uneven and rough, so Gene decided to put a fillet of thickened resin in all the seams to make it easier to lay in a new layer of fiberglass. In places, the corners are actually recessed a bit, so Gene decided to build them out with a thick mix of chopped strand and cabosil. It would be almost impossible to lay in a new sheet that maintained contact around the corners without doing this.
A late start on this day meant that by the time the tank well was wiped clean with solvent and ready for glass work, the shop lights were needed as the sun was getting low in the sky. In the picture at left, the starboard side of the tank well has a fillet layed in the seam and the port side is painted with wet resin and ready for filleting.

Gene was laying the chopped strand and cabosil mix into the seam with a mixing stick, resulting in a thick fillet. This technique was really overkill for the problem at hand, he later decided, but it did work to make a nice radius that will make it easy to lay in a sheet of fiberglass.
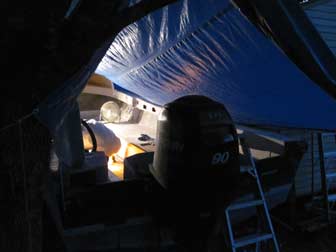
The bugs come out and I go inside at sundown, but Gene was still smoothing corners until well after sundown, when this photo was taken. He told me when he came in that some of those bugs are now permanently entombed in the tank well fillets on Fluke.

September 10, 2011
Fillets in Pec Fuel Tank Compartment
The corners of the tank well on Pec were better than the ones on Fluke, with only a couple of recessed areas to build out with the chopped strand mix. Getting into those corners with the grinder was a challenge, so Gene tried this wire brush in the drill. It worked very well, smoothing and roughing up a nice curve in the corners.
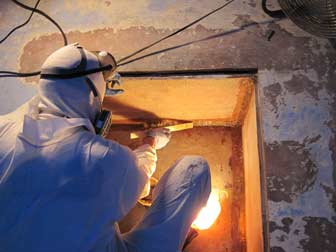
After vacuuming up all the dust from the last bit of grinding, Gene wiped down the corners with acetone. Those organic compound filters on the respirators really do a great job. When I walked up to take this picture and commented on the strong smell of acetone in the air, he said he could not smell it at all through the respirator filters.

After painting all the corners with resin, Gene added chopped fiberglass strands and Cab-O-Sil to the remaining mix to fill in the areas where the joint is a bit recessed. The resulting mix was like thick peanut butter, except that peanut butter does not have annoying strands that want to clump up and stick out.
Instead of a mixing stick, Gene is using some cedar shims that have the tips ground to a semicircle to apply the fillets on Pec. The round, flexible shim allows a smaller and smoother fillet to be applied, but smooth is still a relative thing with the chopped strands in the mix. If there is a way to lay this stuff in without it coming out lumpy, we have not yet found it. Still, it was better than yesterday's result on Fluke, and used less material.

Once the areas to be filled with chopped strand mix were done, Gene switched over to thickening the resin batches with straight cabosil powder. This resulted in a much easier consistency to work into the corner and leave a smooth curve behind.
The last bit of the final batch of cabosil fairing mix was used to smooth over the top of the lumpy chopped strand fillet laid in earlier. You could almost turn a train in the radius created, so it should be very easy to lay fiberglass smoothly around this corner when the time comes.

Editorial Note: There is a gap of nine days since the last update, but all previous ones were done contemporaneously. Around the middle of September, I did the math in my head and realized there was no way Gene was going to finish the boats in time for the next whale season. I decided to stop writing and start helping full time. The date is February 8th as I write this, so all that follows is based on the photos I took along the way and months-old memories. I know how the story ends, but will try not to spoil the ending for readers who do not.

September 19, 2011
Sanding and Grinding in Earnest
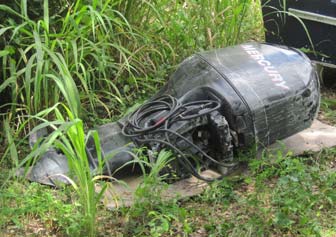
September 19th began with the removal of the last of the old engines. We had left it on the boat for lack of any better place to put it, but it was in the way, so the ground seemed like a better place to put it.
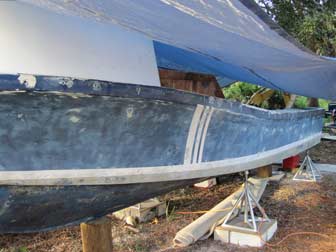
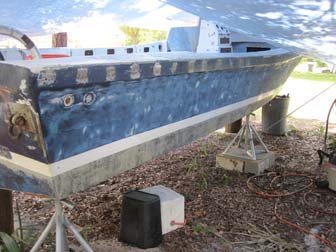
I started sanding down the starboard topsides and transom on Pec after we got the engine removed. The small Shop Vac on the right did a great job when connected to the dust gathering attachment on the Porter Cable sander. I still wore a mask, but the amount of flying dust was dramatically reduced.

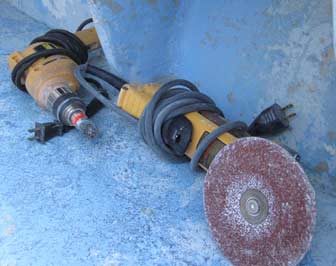
Looking at the pace at which grinding down the decks was proceeding was disheartening. Gene decided to see whether a larger grinder would speed things up, and rented this 7 inch one from Punta Gorda Rent All. It was a bit faster than the small grinder, but not as much as we had hoped.
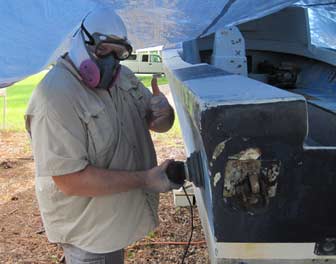
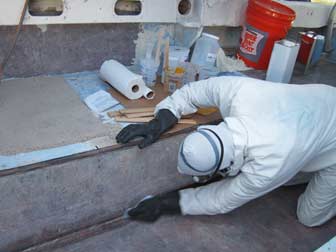
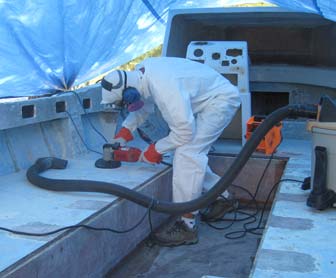
There were areas that could not be reached by the big grinder, such as the hull sides underneath the gunwales. In the picture at left, Gene is grinding off the ridges left when we removed the gussets on Fluke.


Leave a Reply
You must be logged in to post a comment.