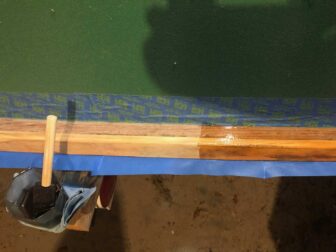
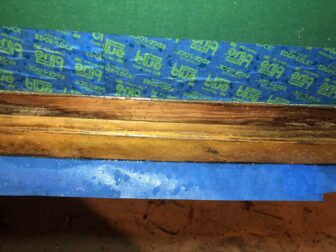
I don't like trying to get varnish to flow upward so I decided to put a few coats on the underside and outside of the Goat's rails with the boat upside down.
A thunderstorm came through while I was varnishing and my ever-vigilant dog ran out to bark ferociously at the unauthorized noise. Then she came back and shook water all over the newly applied varnish. I blew it off with a leaf blower and it dried OK. I put her inside while doing the next couple of coats.
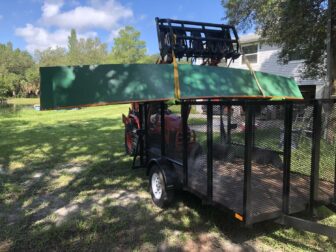
I decided that a good rainy day project would be to flip the Stray Goat back over and start on (what I hoped were) minor repairs and then varnishing. As my projects tend to do, this one began to spiral out of control, but more on that later. Here's the part that went well! I didn't have anyone around to help me get the Goat off the trailer so I decided it was time to pick up a boat with the new tractor. I set it down in the grass while removing the extra pieces of wood I had added to the trailer to make it fit upside down then rolled it over and picked it up with the tractor again to get the trailer underneath.
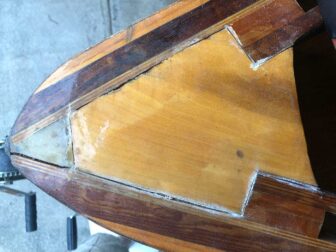
The first problem I decided to tackle was the delamination of the bow piece. One of the other volunteers at the Charlotte Harbor Community Sailing Center had previously decided to help out by fixing this problem with a couple of screws. We love him but it didn't help and instead appeared to lock the piece in the wrong position.
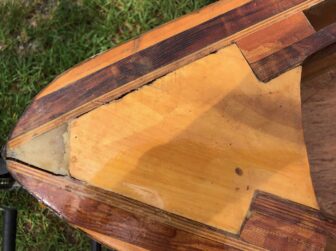
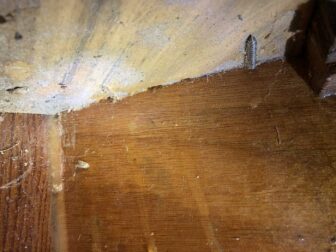
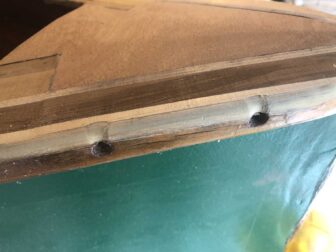
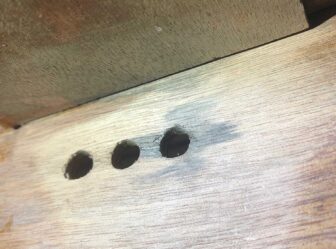
I stuffed some wax into the screw holes so that the screw heads would not get full of varnish. This pic also shows how the piece of wood is being held too high by the screws.
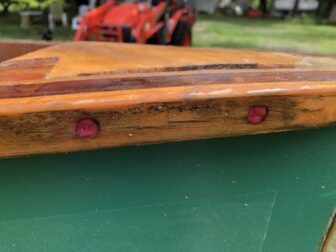
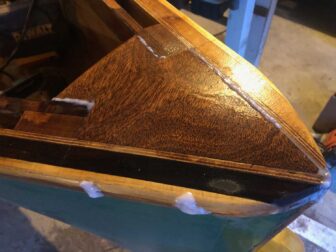
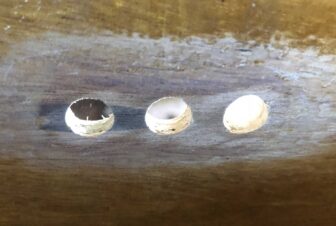
The view from the other side. One screw missed the target piece of wood entirely and the other only grazed it.
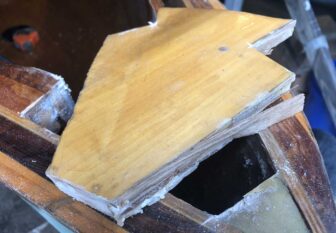
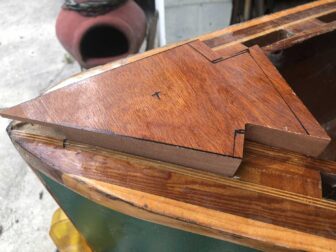
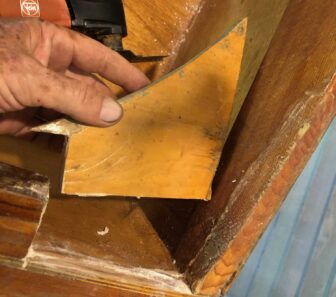
The Brain Trust on the Goat Island Skiff Facebook group told me that this piece of wood is called a breasthook and it should really be removed and replaced. The pic at right was taken while sawing it loose. I noticed that the original builder had included a couple of shims to make it fit more or less properly so I cut the shims where possible.
That piece hanging off in this photo is a sliced shim. One of the brain trust members also noted that the puddle of epoxy on top of the stem piece is ugly and should be replaced with a wooden inlay. I wish I knew how to make foreboding music play at this point. If you have some available, this would be a good time to put it on...
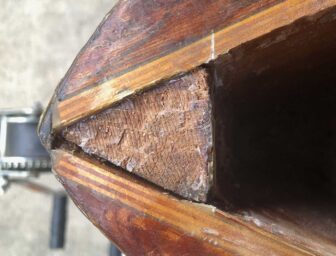
I chiseled out the epoxy atop the stem piece and saw that the plywood on the port side has begun to separate itself from the stem of the boat.
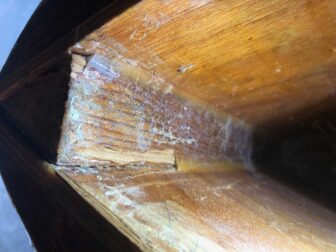
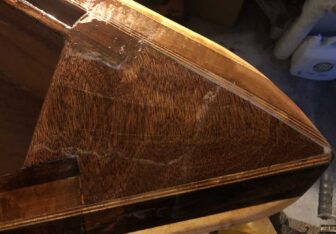
I chiseled off the section of the inside fillet where it had come loose and the pic at left shows the extent of the crack. The top couple of inches of the piece of trim wood that forms the bow of the boat is also loose. Now I'm wondering how to stick it back together.
Not wanting to remove the whole side of the boat to reattach it properly, I opted to clean out the crack between plywood and stem using a saw and sandpaper then epoxied it back together, using a screw to pull it tight. I replaced the cracked-off part of the joint fillet then added a piece of fiberglass running from one side across the stem to the other side. After it cured, I removed the screw, drilled out the hole, and inserted an epoxy-sealed dowel with a bit of epoxy putty.
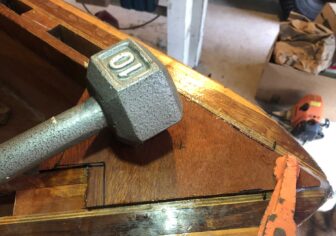
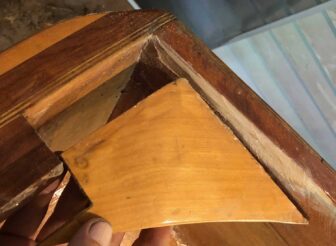
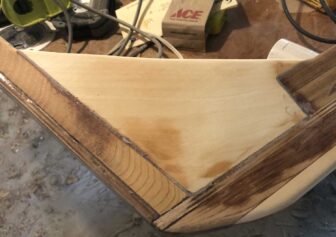
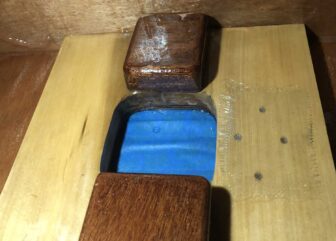
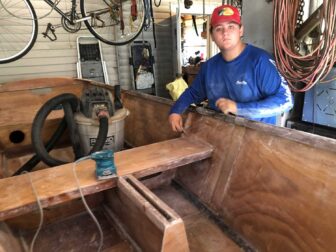
Once the side was reattached, I went to work trying to reshape and shim the old breasthook piece to get it to fit. I quickly concluded that the GIS brain trust on Facebook were right and I should just make a new piece. I dug an old mahogany thwart seat that I had removed from a Boston Whaler 20 years ago from my shed and gave it a shot. Getting the size and angles right proved difficult and my first attempt ended up in the scrap pile. The pic at right is my second attempt while I was shaping it with a belt sander to get it to drop into place.
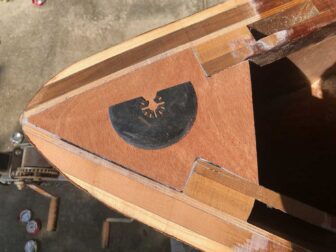
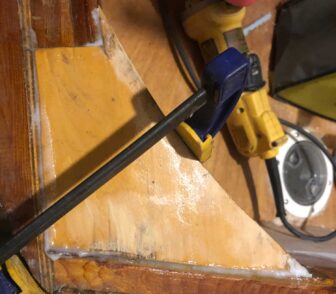
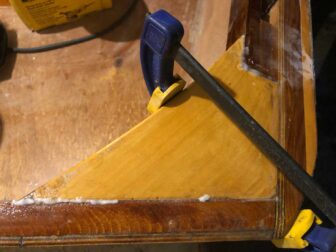
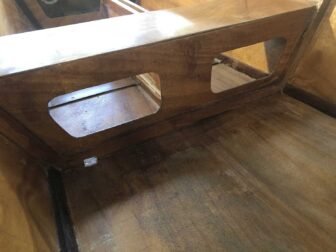
I got it almost right, with a small gap along a couple of edges. I glued it in place with some epoxy putty to help fill the gaps.The outer edges are deliberately left a bit proud of the railing so it can all be sanded to a smooth curve after the epoxy cures.
I didn't get quite enough epoxy putty into a couple of the gaps so I used a saw blade and sandpaper to clean them out a bit in preparation for filling them the rest of the way up.
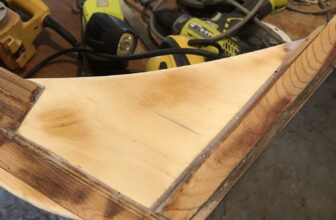
While sanding the breasthook into a smooth curve to meet the rails, I came up with the idea to run a router around the edges to round them off. It would have been a good idea to first fill the old screw holes from the previous repair attempt. I didn't and the router guide wheel ran into the holes, making a couple of nice dents in the rail. Oops!
I mixed up some extra putty when sealing the breasthook and topping off the gaps to fill in the old screw holes and the router dents.
After smoothing all the putty back out I put another coat of epoxy over the breasthook and surrounding area.
The breasthook was not the only important piece of the boat to come unglued. The knees at the transom corners were also separated so I decided to remove them and try to epoxy them back in place. The port side one, shown at right, had completely separated from the transom.
The starboard side knee was attached to the transom but detached from the starboard side of the boat.
On the port side I used a leftover strip of wood from the creation of the new runner to make a tapered shim to go between the knee and the transom. You can see the end of it sticking out in the picture.
On the starboard side I was able to get a pretty good fit just by trimming one edge and putting a bit of epoxy putty in small gaps.
I used the belt sander to smooth the knee and shim on the port side down to be flush with the transom and gunwale.
The starboard side after sanding it down flush. Both sides got a fresh coat of epoxy over the area after this treatment.
While doing the repairs at the corners of the boat, I noticed that the mast partner appeared to have no epoxy to seal the wood. I was most concerned about the exposed edge of the plywood deck since plywood edges are like sponges. I posted the pic at right on the Goat Island Skiff Facebook group asking whether I should seal this area. The overwhelming response was, yes, but do something about that structural crack!!
Designer Michael Storer came along and asked whether the stainless fitting shown was behind or to the side of the mast. It was behind it. Storer said it should be to one side and putting it behind the mast was the cause of the crack. Sticking my camera up underneath revealed that the crack extended the full span of the partner reinforcement.
Not wanting to squeeze myself down into the bottom of the boat and work upside down to fix this problem, I came up with the idea of inverting the boat across my yard trailer so that the repair could be done right side up.
I used some of my first (failed) attempt to cut out a breashook to make mahogany reinforcement pieces to go over the crack. Michael Storer noted that these were unnecessarily heavy and that the grain alignment in one of them meant it could still split again. When sealing it with epoxy, I put a layer of fiberglass cloth over it to help it hold together. I also drilled new holes to remount the stainless fitting, sealed those holes with epoxy, and put a layer of fiberglass in that area. In retrospect, just fiberglassing the area instead of using wood reinforcement would have been a bunch easier and lighter and would not need multiple coats of epoxy to seal it.
I thought this post would be about varnishing the interior of the Stray Goat but it wound up being about various repairs that were necessary first steps, and that trend continued.
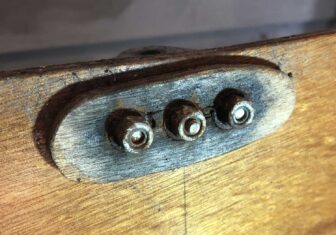
At right is a picture of the upper rudder gudgeon mount and its backing plate, which is obviously unsealed plywood that is beginning to show some water damage.
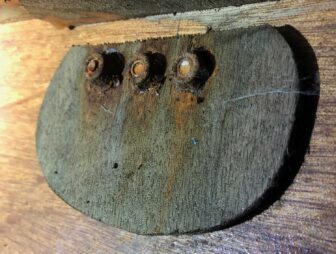
Things got a bit worse when I stuck my camera under the aft deck to take a picture of the lower gudgeon mount and backing plate. This one shows more severe water stains and rust on the stainless lock nuts. This is why they're called stain less, not stain proof.
The upper gudgeon screws came off without a fight and the backing plate turned out not to be glued to the transom at all so it just fell off when the hardware came out. I was relieved to learn that I probably would not have to find a way to remove the lower gudgeon backing plate and set about trying to remove the screws and lock nuts. The screws turned, telling me that nothing was preventing water from coming in when the transom was low enough in the water to submerge the fitting. The nuts were firmly seized in place. I got out my impact driver and smacked them as hard as I dared with no luck. I then decided to grind off the screw heads and remove them by twisting/pulling on the seized nuts, which worked.
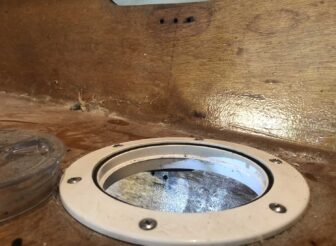
This 4" deck plate provides the only access to get at the lower gudgeon under the aft deck.
On the recommendation of the brain trust at Duckworks on Facebook, I decided to drill out the 3/16" holes for the lower gudgeon to 3/8" and fill them with epoxy putty to prevent more water from soaking into the plywood transom. I worked my Fein tool with a sanding pad in through the deck plate and sanded down the inside to bare wood, exposing the water stains.
The view of the lower gudgeon area from the outside showed that the water staining around the port side screw extends all the way through the transom. I tapped it and tested it for softness with my fingernail and decided it would be OK. The area got a thorough soaking wipe down with acetone after sanding it. I hope black rot doesn't like acetone!
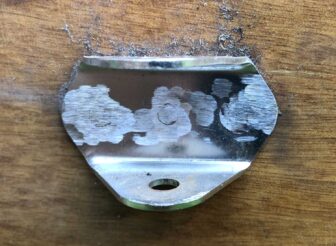
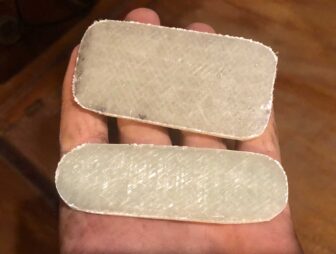
Learning from my mast partner experience, I decided to discard the old backing plates and made some new ones of the same size by laying up 4 layers of sturdy biaxial fiberglass cloth with epoxy and compressing them between smooth pieces of vinyl. I'm pretty sure these will last the life of the boat, however long that might be.
I coated the inside of the lower gudgeon area and the new backing plate with epoxy and used a couple of screws to hold it in place while the epoxy cured.
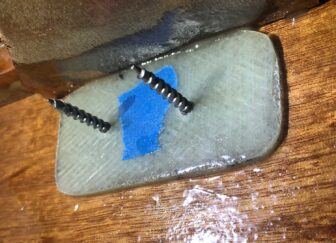
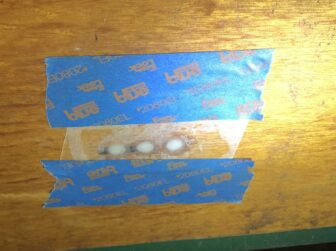
After the backing plate epoxy cured, I removed the screws, taped off the inside holes, and filled the oversized holes with epoxy putty, using some wax paper and masking tape to smooth it and hold the putty in place while it cured.
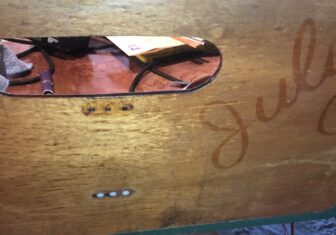
Since the upper gudgeon showed no serious water damage and is unlikely to be submerged, I just sanded the area, cleaned out the holes with sandpaper and acetone, and painted the area and holes with liquid epoxy. I also removed the vinyl name letters from the transom because I intend to put a few coats of varnish on it.
I ran a router around the gunwales inside and out to round off the sharp edges then painted epoxy over the newly exposed wood. I might actually be ready to apply varnish soon, if I don't look too hard at any more parts of the boat!
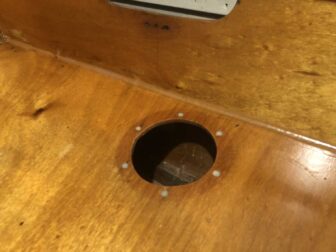
But, of course, I can't resist looking a bit harder. I decided that removing the 4" deck plates from the aft buoyancy compartment would be quicker and easier than sanding and varnishing around them. The sealant used by the original builder was a kind that remains soft and sticky so removing it was a tedious and messy task. It also didn't work that well, since I discovered signs of water damage around the screw holes on the one near the transom. This makes sense because each screw can hold a little puddle over its head, trapped by the surrounding plastic of the fitting. That water can evaporate or it can make its way down the screw and find the wood. The latter happened. Anticipating that this might happen again, I drilled the holes out to a larger size and filled them with epoxy putty. I also plan to try putting a little rubber O-ring on each screw when I reinstall the deck plate. The one on the forward face of the compartment sits vertically so did not show any evidence of this problem since it can't hold a puddle over the screw.
Thinking that the boat was at last ready for varnish, I called my friend's teenage son over to help me sand it down. I ran the random orbital sander while he hand-sanded the holes formed by the gunwale spacers and other spots where the power sander can't reach.
There's always at least one more thing. Staring at the boat and contemplating opening up the can of varnish, I remembered a problem that I encountered the first time I gave this boat a bath. It held water on the starboard side of the mast step and on the starboard side of the daggerboard trunk because only the port sides of those bulkheads had drain holes. Not wanting to deal with those puddles while cleaning the boat in the future, I decided to make some holes.
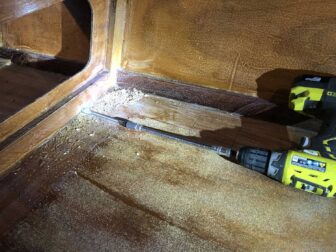
Unsure of how to make them without damaging the plywood bottom of the boat, I consulted the brain trust on the Goat Island Skiff Facebook group. They had lots of ideas and the one I settled on was to use a flexible drill extension to make two holes and then cut out the wood in between with the Fein Multimaster.
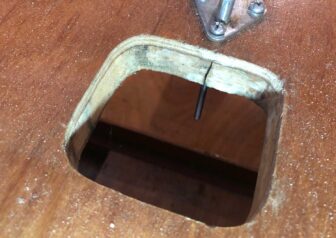
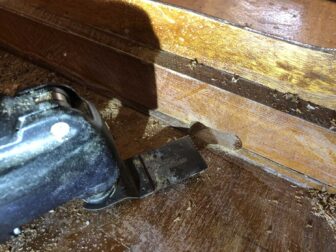
The resulting hole looked like this when cut out. I made another just like it up at the bulkhead aft of the mast step. I sealed both with epoxy, sanded them down, did a bit more spot sanding around the boat, wiped it down twice, and... at long last...
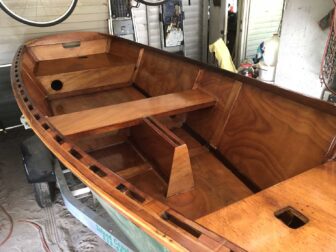
Varnish! I plan to put two more coats and then start sailing the boat. I will add more coats as time goes by, but I figure at least three will adequately protect the boat so that it can be used.

Leave a Reply
You must be logged in to post a comment.