I repainted the whole deck after the repairs detailed in the first post in this series.
I once again used Behr deck paint from Home Depot, but this time tried their non-skid additive. It is a fine powder, almost like flour, and gave the deck the texture of very fine sandpaper. Much easier on the knees than the glass beads I had used before!
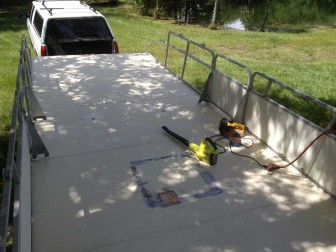
What to do with a clean, empty, newly painted deck? Cut a hole in it, of course!
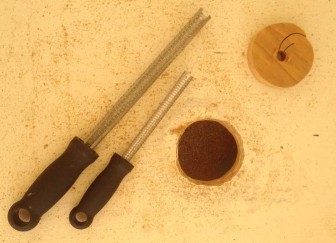
I used those graters to round off the edge of the hole, then painted it with West System epoxy.

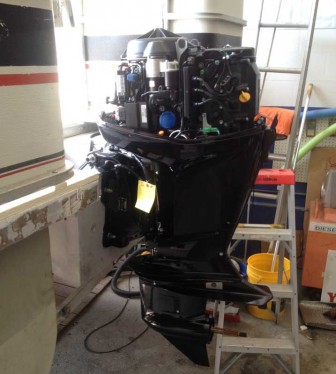
We ordered a new Tohatsu 60 hp High Thrust 4 stroke outboard from Gulf Island Sails, where I used to work. Tohatsu Marine and Honda have merged their operations, so all Tohatsu engines from 60 - 250 hp are actually Honda products. Ours has the midnight blue paint and Tohatsu labels, but some parts inside the cowling are still stamped "Honda" so I have been calling it a Tohonda.
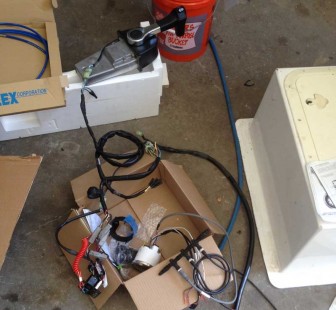
Before attempting to run the instrument and control cables through the boat, I decided it would be a good idea to hook them all up on the shop floor, just to make sure I knew what plug went where. All went well until it came to providing power to the tachometer. We knew that ignition switch-controlled power must be somewhere in the cluster of colored wires, but had no clue which ones. The wiring diagram was like a really bad joke: it actually showed us that we could expect to find a white wire, a yellow wire, a black wire, etc, but gave no clue as to what each of those actually did. We already knew we were looking at colored wires!
Experimenting with likely candidates, we found 10.5 volts between two wires. It turns out those are not the ones you're supposed to use. Meanwhile, back indoors, the boss called the Tohatsu rep, who told him it's the black wire with the yellow stripe that we're looking for, and sure enough, it worked! Maybe they will update the wiring diagram to include that information.

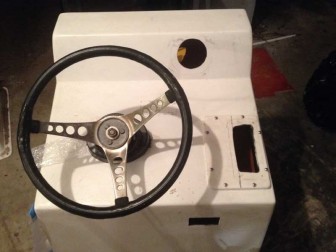
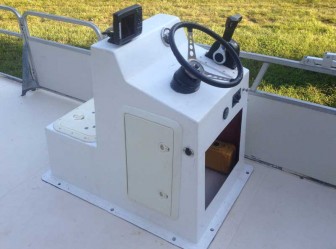
I cut some more holes in the console to install the helm, throttle, tachometer, and ignition switch. My first attempt at positioning the throttle put it too close to the steering wheel, so the console got its first plastic "oops" hole cover panel before ever being used on a boat. It doesn't look too bad and should be a bit more waterproof with the hole raised above console runoff, but it would have been nice to get the hole right the first time. Live and learn.
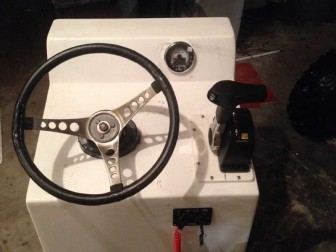
The new console with engine controls and tach in place. I also installed a side door and a round 8" deck plate to access dash instruments. I cut a hole for a door on the aft face of the console, but have not yet found a door. Time to put the new console on the boat!

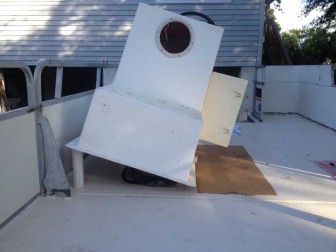
After drilling all the bolt holes, I drew the "footprint" of the console on the deck with a Sharpie marker and then tilted the console up and clear, resting it on some PVC pipes. After applying caulk, I lowered it back down. You can see the new side door hanging open and the access plate in the picture at right.
I ran the steering cable and connected it to the helm prior to bolting the console in place to allow for more freedom of movement when attaching it. This made it a bit easier, but was not really necessary. At the other end, it would have been a good idea to run the steering cable through the engine prior to mounting it. I had to remove the side trim from the boat and bend the cable pretty far to thread the steering rod through. In the process, the trim tore up some of the deck edge, necessitating another repair. It would have been easier to just unbolt the engine, even easier to read and heed the part of the rigging manual that says to run the steering rod before mounting the engine. More living and learning.
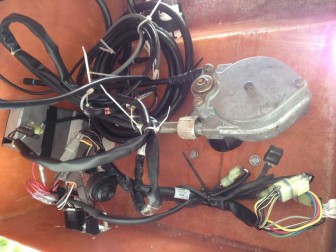
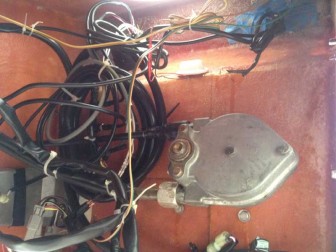
The engine wiring harness is 20 feet long and you don't cut those, so the excess was coiled and secured to the underside of the console face with screw-on zip ties. The ignition switch wires were secured with a separate zip tie, then the tach and tilt/trim wires were tied off to the main wiring harness and the steering cable. At left is the resulting electrical spectacle.

At this point, I realized we were just a couple of steps from having an operational boat. I was very curious how the new motor well would perform and got to work connecting the fuel filter and shutoff valve to the tank. I installed two batteries under the console and used the scrap fiberglass that I cut out when installing the console door to make a battery switch panel.
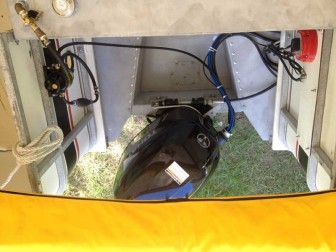
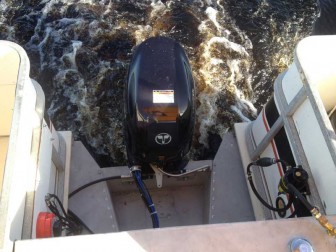
In the picture at right, note the curved steering linkage rod connected very close to the engine. This feature of the High Thrust model allows the engine to turn 50 degrees to each side of centerline, 20 degrees more than standard outboards.
We finally got to go for our first ride! It became apparent early on that the engine was mounted too low and I would have to re-mount it. Other than that, I was pleased with how the new motor well handled chop and really surprised by how much difference the 50 degree steering makes. The boat used to take a few boatlengths to turn around and will almost turn in its own length now!
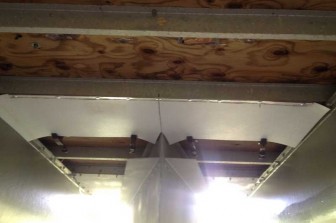
When we got the boat back on the trailer, I could see another problem with the new motor well design. It doesn't slap like the old one did, but when it slices waves, the water goes somewhere. Specifically, it goes all over the exposed underside of the plywood deck. The splash guards on the motor well do little to prevent this.

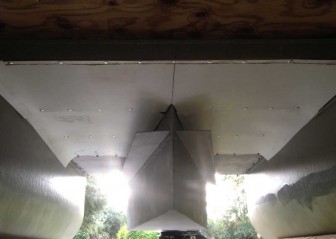
I plan to ask the welder about some modifications to the motor well, but as a partial solution to the splashing problem I decided to rivet some plastic sheeting to the underside of the deck beams. I could not figure out how to cut and install it in one piece, so I attached the front part first, securing the aft edge with spring clamps while riveting the forward edge.
The parts overlap and are riveted together and to the crossbeam at the front edge, then secured with more rivets in the center. At the aft end, I used the bolts that attach the motor well plates to the crossbeam to attach the plastic.

I enlisted the help of one of my neighbors to move the engine a bit higher. In the process, I discovered a couple of additional problems. The access plate in the motor well and/or the mounting bolts were leaking, so there was some water in the well. I can stop leaks eventually. The other problem is worse: the two lower mounting holes are drilled a bit low. The engine is at an acceptable height now, but I'd like to move it up another inch. I plan to ask the welder what to do about this situation.
With the engine operational, I decided it was time for amenities. First up, the GPS/Fishfinder mount and wires. To seal the hole where the wires pass through the top of the console, I created a blue tape "dam" around them and filled the hole with caulk. I also installed a down-facing courtesy light above the console bench seat so it can serve as a lit working area at night. While I was at it, I added an LED light, shining brightly in the picture at left. I probably should have turned it off prior to taking the picture. Both lights are controlled by a single switch, installed near the ignition switch.

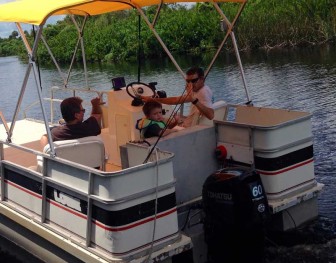
We took our grandson on our first "real" ride on the repowered boat, meaning not a test run, not for break-in purposes. Just a pleasure trip up the creek to our friend Pete's house, where he took the picture at right.
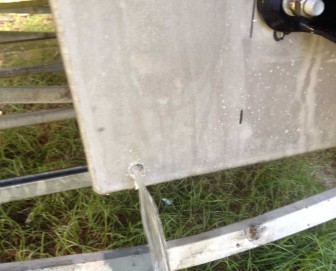
I decided to put a couple of drain holes into the motor well. In the process, I found out that my second attempt to seal it was not successful and they are still needed. I'm pretty sure I know where the leaks are this time and can seal them. Or try again.

I added a couple of finishing touches to the console, shown at right: a 12 volt outlet to power a baitwell or spotlight and a separate engine hour meter (there is one built into the tachometer). I still have not found nor built a door for the aft face of the console, but it works!
At last, we got to take a shot at my wife's dream of catching a tarpon from her own boat on the harbor! After a brief delay in which I learned that these newfangled safety switches are picky about just how they are inserted, we followed up on a rumor of small tarpon near the US 41 bridges. Success! Well, sort of. It's a micro-tarpon, probably about ten pounds, but the bottom line is the same: she caught a tarpon in the harbor!
Now she wants a bigger one. Maybe in the next installment...

Leave a Reply
You must be logged in to post a comment.