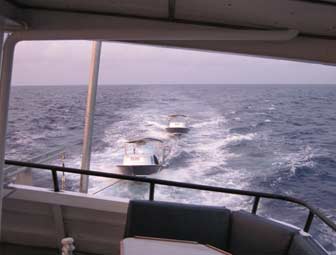
The last time I saw the whale watching tenders Trini and Bago was in April, when we went to the Silver Bank to swim with the Humpback Whales. These boats are 1999 Privateer Renegades, and I found a picture of one of them on the manufacturer website. Work boats have a hard life, and these do not look quite like that picture any more! They have been towed all over the tropics, battered against docks and steel ships by storms, swamped, and have worn out their third set of engines. One aluminum fuel tank had water contamination this season, and what remains of the electrical systems is corroded and useless.
Conscious Breath Adventures acquired these boats from the Dancer Fleet at the end of the 2011 season, and Captain Gene Flipse intends to restore and repower them and then return them to the Dominican Republic before the start of the 2012 whale diving season. I can't resist a project like this one, and asked him to bring the boats to our place to do the work. Living in a rural area, we do not have neighbors who might complain about grinding noises, flying dust and other side effects of boat rebuilding. We have lots of space and neighbors who own heavy equipment, so bringing them here was a natural choice.
There will be quite a few boat building, outfitting and repair lessons in the course of restoring these boats, and I intend to document the whole process here. I hope it is a good story with a happy ending!

May 23, 2011
Trailering Boats Across Florida
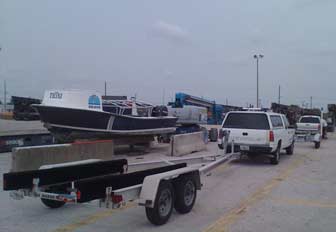
Towing a couple of borrowed trailers, Gene and I went to the Tropical Freight yard in West Palm Beach to pick up the boats. The trailer in the foreground actually belongs to AMI/Crossroads, and is used to haul a very similar Privateer boat. We did not know at the time that the AMI boat had an identical hull, and were surprised at our "good luck" in borrowing a trailer that did not need adjustment to fit the hull.
The trailer in the background belongs to a friend, who uses it to haul his Concept 22. It is rated to carry the weight of these boats, assuming they have not gained too much weight over the years. We knew the trailer was a bit on the light side, but it was the best one we could borrow at the time.
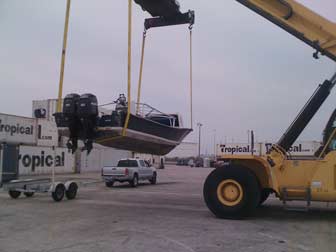
We were wondering how they were going to get the boats off of the shipping cradles and onto the trailers, until this big crane pulled up. The attachment at the top is for handling cargo containers, but with a couple of straps, it did a great job at picking up boats. The operator can swivel and tilt the straps, and he was able to drop the boats on the trailers with precision.

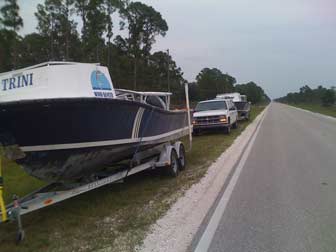
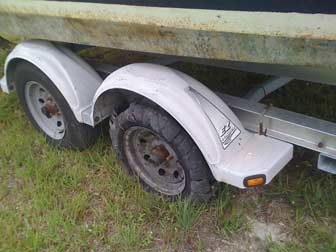
We made it most of the way back across the state without incident, but as we pulled through the intersection of Highway 31 on Bermont Road, I noticed that the right side of the trailer in front of me seemed a bit squishy.
Next, I thought I saw a little black rock or something fly up, and started reaching for my phone, in case I was watching the death of a tire. I was. Large pieces started to fly.
By the time I redialed Gene and he picked up the phone, all he said was, "Yeah, I know, I'm pulling over."
Obviously, that one is not going to make it the rest of the way, even though we only had a few miles to go. We were lucky to have made it so far because our position made it convenient for the owner of the blown out trailer to come and rescue us. I continued home while he came and got Gene and the tire, had a new one put on, and returned him to the road side. We had both boats on the property by dark. What a day!

May 24, 2011
Removing Boat from Trailer to Jack Stands
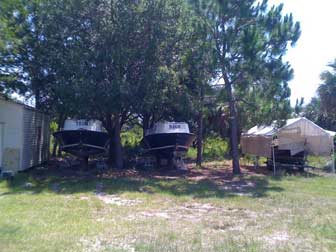
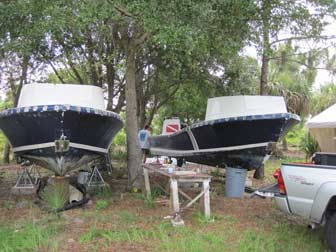
There were a few twists along the way between arrival of the boats on the property and this picture of them sitting peacefully on their stands. Unfortunately, I was too involved in the process to take pictures of the really fun parts.
We had to leave the shipping cradles at the Tropical Freight yard, so the first priority was to get one boat off of a trailer so that Gene could return with an empty trailer to retrieve them. My neighbor was kind enough to lend us his endloader/backhoe for this operation, but it does not come with an operator, so we were left with me: a self-taught amateur. With the boat in position and the stern raised on jack stands, I attempted to lift the bow clear of the trailer using the backhoe arm. It almost worked, but did not have quite enough vertical travel to get the boat clear of the trailer. I turned the machine around and used the endloader, which happened to have his forks on it. Using the loader end gave us the needed height, but meant that clearance between the machine and trailer was very tight as the trailer was pulled out from under the boat.
With the trailer clear and the boat hanging in the air, Gene quickly put the blocks, jackstands, and piece of a phone pole in place and I let the boat down. What a relief! No damage to boat, trailer, end loader, or people! One down, one to go, but first Gene had to go get his boat stands from the freight yard. That took the rest of the day.

May 25, 2011
Moving Second Boat from Trailer to Jack Stands
Getting the second boat off of the trailer did not go quite as smoothly. Gene got it in position and prepared the ground for the stands, lowered the trailer tongue to get the stern up on the jack stands, and we got to the part where we hang the boat from the endloader forks when disaster struck. I was carefully lifting the boat into the air while Gene watched to see when we were clear of the bunks when there was a sudden BANG beside me, followed by a geyser of hydraulic fluid erupting all over the place. The boat immediately settled back to the trailer, and I saw that the loader bucket and forks were about to fall on the boat! I did not know it, but apparently the machine has some kind of lock-out to prevent things from falling from a great height in the event of a blown hose. I guess it was not going to fall much further, but in that moment, I had visions of the bucket crushing the hard dodger on the boat.
I quickly slammed the transmission in reverse and backed away. Somehow, the chain and strap we were using came free from the fork cleanly, and I got the forks clear of the boat, dropped the bucket to the ground and shut down the machine. As soon as I did, the pressure was off the hydraulic system and the geyser of fluid slowed to a trickle. I hopped down and looked at the source of the oil, and our problem was obvious: a very old hydraulic hose had failed. I told Gene that Chenango Supply in Cleveland would make us a new one while he waited, so off he went. We were very lucky that this failure happened while the trailer was still under the boat, and that I somehow extracted the machine from the situation without hurting the boat. I wish I had set a video camera up and just put it on record for this whole operation. It would have made an amusing youtube video of the Hold mah beer and watch this! genre.

June 5, 2011
Removing Rub Rails
The long process of destruction and disassembly that must precede rebuilding begins at last. We started with the rub rails, which are heavy duty rubber extrusions bolted through the hull to deck joint. These are very strong rub rails, meant to protect the boats when they bash against steel ships in rough conditions, but they were not enough to prevent damage when the boats were left tied to a pier in a tropical storm. The rubrails came off without too much of a fight. Thank goodness for the pneumatic ratchet wrench

June 6, 2011
Cleaning Up, Assessing the Job
There was no time to start any major projects this day, so Gene worked on cleaning up the boats and removing leaves while I looked around at future projects we would need to do. I looked for trouble, in other words.
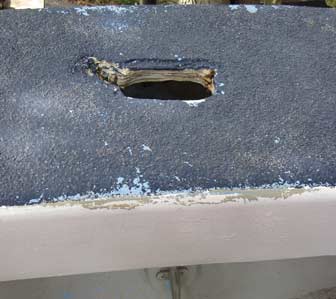
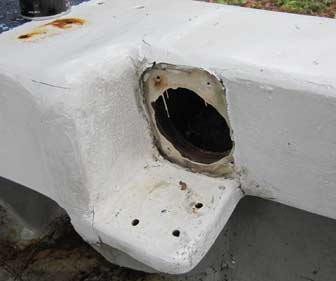
It was not too hard to find some problems, and this photo is just one example. With no hawse pipe through the deck, mooring lines have exposed and cut into the plywood core of the side decks of both boats. This is not the only place where a visual inspection of plywood core is possible. I also noted various cracks, hull to deck separation, previous repairs of questionable integrity, corroded hardware, and other issues to address, but those will all have to wait until another day...

July 16, 2011
The "Before" Pictures of Fluke and Pec
The names were removed from the former Trini and Bago, along with the Dancer Fleet logos, and with that they became Fluke and Pec, at least to me. Changing the name of a boat is apparently rather irritating to the Sea God Neptune, who must have better things to do than learn a new name for a known boat just because some mere mortal wants it that way. Anyway, my opinion is that a boat needs a name, especially if you have twin boats to write about. My wife suggested Fluke and Pec as the new tender names, so that is what I will call them unless/until Gene decides on different permanent names. Just to keep them straight, the ex-Trini is Fluke and the ex-Bago is Pec.
I decided to take a few more detailed photos of the various problems with the boats before we get too far into tearing them apart.

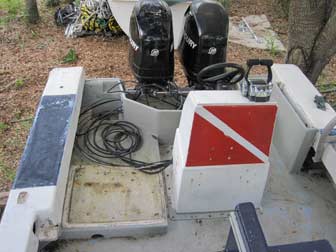
The engines from Pec were sold and gone, and a buyer was interested in one of the engines on Fluke, so a first step was to remove the control cables, wiring harnesses, and hydraulic steering system from the boat. The console came right off just by removing screws and having our large friend, Steve, hip check it. Unfortunately, it delaminated the skin in that area, but if that is all that is wrong, it will be easy to fix.
We had a bit of an electrical mystery. The starboard engine on Fluke would run only if the port one was also hooked to the battery. It took us a while to figure out, but the problem was that the starboard engine had a blown fuse, but if the port one was connected to a battery, electrical power was allowed through because the two engines are connected at the trim controls. If either one has power, both have power to the ignition key through that interconnection. We could not figure out why that starboard one had no power unless the port one was hooked up, and to make matters worse, we initially thought we knew that the problem must be in the wiring harness. It turns out that was wrong, the problem was back inside the engine cowling. The two wiring harnesses, while possibly the messiest I have ever seen and certain to give marine insurers and surveyors nightmares, were working correctly.
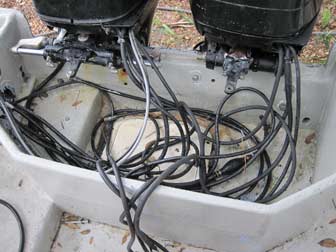
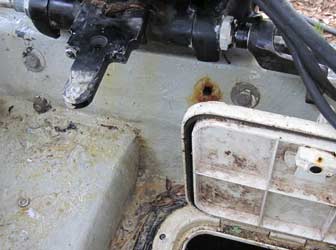
The outboard motor well on Fluke. In fairness, it was not quite this messy when in actual service. We had started separating the engines by the time I took this picture.
Things of note in this photo:
- There are empty engine mounting holes, probably from previous engines.
- Not shown: the lower-outside mounting bolt on each engine turned out to be a lag screw.
- There are a couple of other holes that do not look correctly sealed.
- The hatch that provides access to the bilge is old and needs replacement.
- The connections on the hydraulic steering are badly corroded. More on that later.

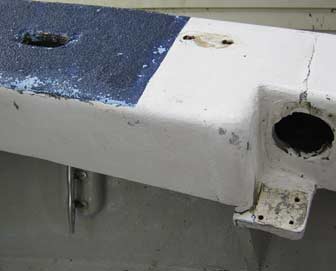
Things of note in this photo of Fluke's starboard side:
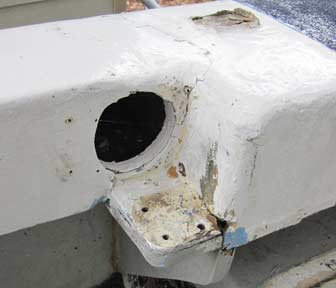
- Plywood core is exposed where the hawse pipe fitting through the deck is missing.
- Empty holes where aluminum frame top was attached.
- Crack in side deck.
- Plywood base for frame top cracked and untabbed.
- Not shown: a rather ugly hull to deck joint repair that leaks.
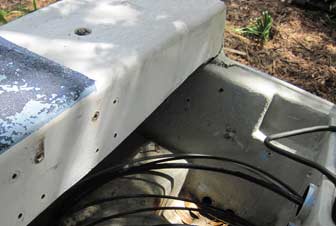
This photo of Fluke's starboard side looking aft shows a kind of mirror image of the problems in the photo at right. The two places where the aluminum top frame was attached require attention, and there is a crack in the deck surface. The hull to deck joint is OK back in this area, until you get a bit further aft...

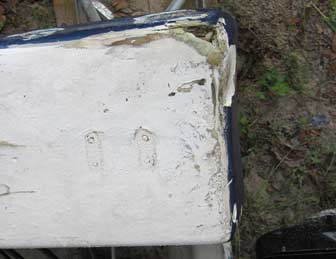
Various issues in this photo of Fluke's starboard side to transom joint, which also shows a notch in the transom of unknown purpose and origin:
- Cleat and stern light were removed, holes not filled properly.
- Two sets of four holes where the fuel filters were mounted.
- Crack where transom joins side deck inside gunwale.
- Several holes in transom that need repair.
- Bilge scupper pipes should be resealed.
- Motor well pass-throughs not sealed outside of well.
Pec has a similar, but somewhat rougher-cut, notch in the transom. My guess is that they were put there to accomodate a kicker engine. The rest of the transom is too thick for standard motor mount clamps used on small engines.
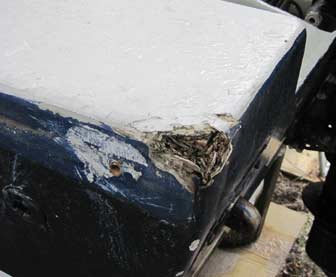
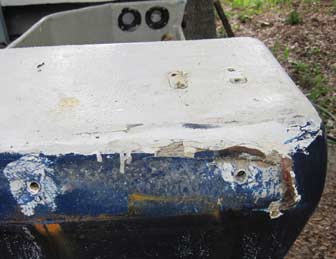
Life is tough for a small, plastic/wood composite boat that is often next to a large, metal boat in rough conditions. It's hard to say which of the four corners on the two boats is really the worst at this point, but this corner of Fluke is definitely a contender. Ouch! That was repaired and the repair has been resmashed, in case it is not obvious from the picture. We're going to have to take a good bit of this corner off and do it over.

The previous owners used large fender balls and an industrial rub rail to protect these boats, but now and then a corner crunching would occur anyway. This one must have fared the best of all over the years, and never had more than a minor repair. Obviously, it is time for a more extensive repair. This one gets my "worst corner" vote just for having more than one piece of plywood core exposed. We have checked with a hammer and moisture meter and the damage has not spread far at all. More to follow on this one when we open it up.
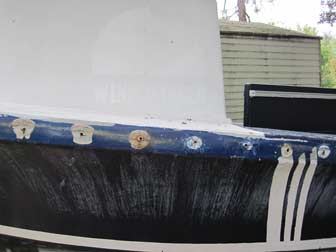
Also visible in this photo is one of many holes used to through-bolt the rub rail to the hull/deck joint. All of those holes, along with some previous ones revealed when we pulled away the rub rail, will be repaired. They are worn, and getting them to align with the new material will be difficult at best. The current thinking is to extend the rub rail around the corner of the transom. They make a special piece for that purpose, since the material is difficult to bend. It would certainly help with the occasional corner crunch!
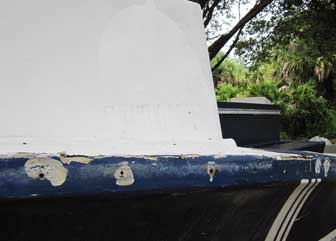
These boats were both tied on a fairly exposed dock in a tropical storm and they took a beating. The gray lines along the hull/deck joint are parts of a repair done at the time. Barely visible at the right edge of the photo is another missing hawse pipe. Both of these areas need a bit of attention.

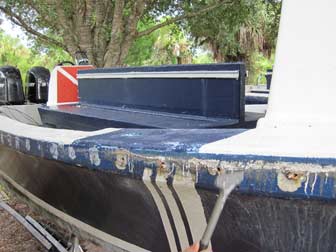
One last shot of Fluke before we move on to Pec. This one shows a repaired area of the gunwale and hull to deck joint, and in the foreground the razor scraper that Gene was using to remove caulk from around the rub rail attachment holes. Out on the Silver Bank, I was hiding on the other side of that repair in the protection of the dodger, and I can report that it is definitely leaking. It is on the list to be ground down and repaired again.
The "before" tour of Pec begins with this shot of the port side hull to deck joint. Obviously, a failed repair in this area very similar to the one on the other side of Fluke. The repair does not look any better on the inside, but at least it is pretty easy to access. Another grind and glass job.

Both of the stern corners on Pec look about like this: bulging with old repairs that have since been battered and cracked.
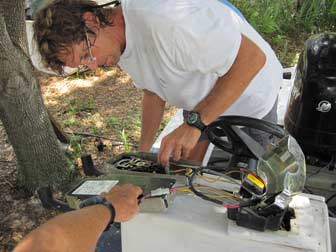
In our continuing efforts to figure out what was wrong with the wiring harness on Fluke, we disassembled the gearshift/throttles on Pec to examine just how those trim controls and deadman switches are connected. The examination did help, but we were still on the wrong track for a while.

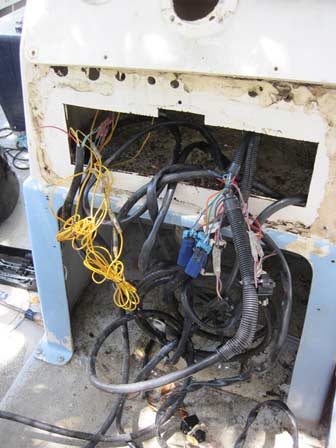
By the time the guages, throttles, and steering were removed from the console, it reminded me of one of those Halloween pumpkin carvings in which the pumpkin has vomited its seeds. It looks like this console may have eaten a few too many bad wiring harnesses.
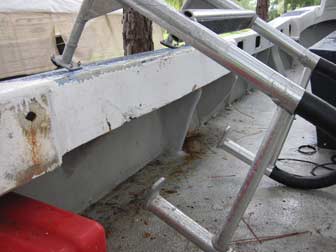
The boarding ladders on these boats wrap all the way around the side of the boat, and where the two tabs hook under the inside there are some cracks. When not in use, the ladders stow in boxes along the port side, and the elongated hole and stained area at left show where that box has already been removed from this boat.

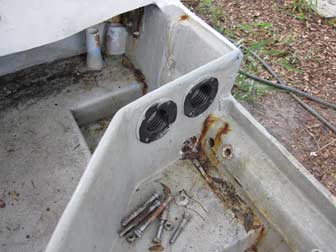
There are quite a few things of note in this photo of the motor well and inside starboard corner on Pec.
- Both boats have PVC pipes through the deck in the aft corners, but only Pec has an extra one.
- Unsealed hole through motor well.
- Old mounting hole beside existing one in transom.
- Yes, that is one of the lag screws that was helping to hold a 90 hp engine.
As on Fluke, there is evidence of cracking and previous repairs to the gunwale and to the bracket that holds the aluminum frame top supports. All of the frame supports on both boats are in need of at least a bit of rebuilding. We have discussed a couple of ways to make it stronger so that it does not break again in this area.

July 23, 2011
Removing Hydraulic Steering System
The engines on these boats are being replaced, but the hydraulic steering systems are still in good condition and will be put back on the boats when the time comes. A potential customer for one of Fluke's engines was coming the next day, so the first order of business this day was to remove the hydraulic steering cylinder and brackets from that engine. They did not want to give up without a fight, and Gene soon resorted to heating the frozen mounting nuts with a torch. There was minor collateral damage to one plastic part, but the important pieces came off intact.
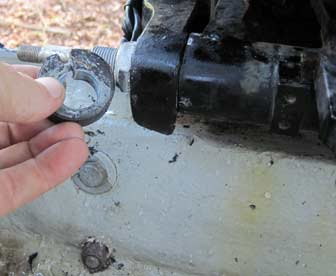
One of the pieces that we removed in disassembling the hydraulic steering mount is shown in the photo at left. My guess is that this is a sacrificial anode. It was just wrapped around the mounting rod and secured with a hex screw, and performed no identifiable purpose. I scratched it, and it appears to be bronze.

The steering system did not quite come off intact, and this picture shows a bolt that was corroded into the engine's tiller bracket and wrung off when we tried to remove it. Also shown: lower outside engine mounting bolt is too high up and has no washer, but at least it is not a lag screw on that engine. Another rusty mounting hole can be seen inside of the upper inboard mounting bolt. The hatches in both motor wells are going to be replaced.
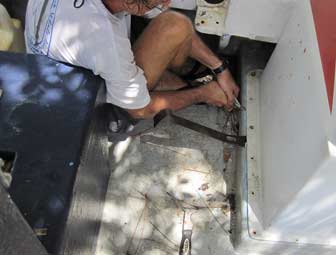
With all the control connections removed, it was time to take the console up off the driver's deck on Pec. It was sitting in a fat bed of adhesive caulk, and showed no signs of movement when we removed all the screws from the deck and pushed on it. Here, Gene is using a hammer to drive a paint scraper through the sealant.

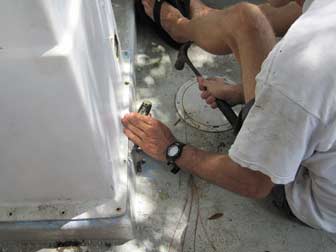
From the "don't try this at home, kids" file: Gene is using a razor blade in a pair of small Vise Grips to slice the sealant bead, which is being stretched by prying with the battle bar. It was at about this time that we noticed black water oozing up through one of the screw holes. It looks like the plywood core underneath the driver's deck is wet and rotten, so at least part of that area will need to be recored. The console finally gave up and broke free, this time without delaminating deck from core. Oh well, some of that laminate is going to have to come off anyway in order to repair the core.
Both boats got a good bath using my electric pressure washer at this point, making them cleaner than I had ever seen them.
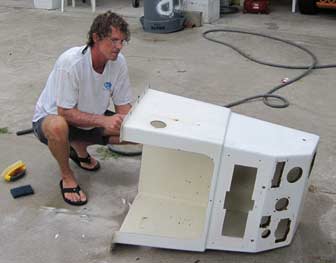
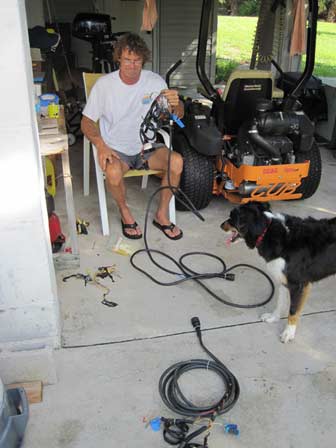
We brought the consoles over to my concrete driveway, which is never actually used for cars, but makes a great place to clean boats and boat parts. One of them was particularly messy due to a small hydraulic steering fluid leak that had been ongoing during the past season. With no way to repair it, the solution was to top it off as needed and wipe up the oil that dripped inside the console. Both consoles got a good cleaning and degreasing, then were set aside to dry.

July 24, 2011
Cutting Fiberglass Benches Free and Removing Outboard Engine
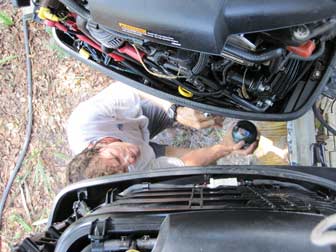
Sunday began with an effort to sort out the wiring harnesses on Fluke. We were still trying to find out which one of these had a problem, and later in the morning, after much head-scratching, we determined that the problem was in the engine, not the harnesses. With that revelation, a short search found the blown fuse that was causing trouble and we swapped it out with one from the other engine. We were glad to have that worked out, since a customer was coming later in the day to purchase it.
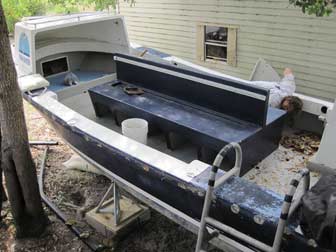
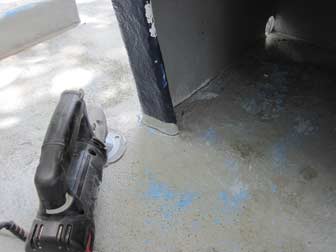
Gene used a grinder and my Roto-Zip with this cutting blade to cut the bench seats free where they were tabbed down to the deck. This was quite a process, and would have gone faster with a Sawzall, but that part comes later. The Roto Zip could cut flush and all the way through, but the blade lifespan was low, so Gene saved it for hard to reach areas and cut the rest free with the grinder disc.

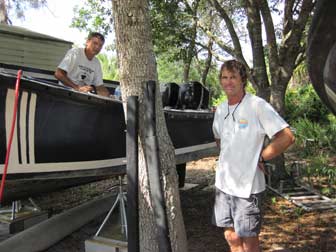
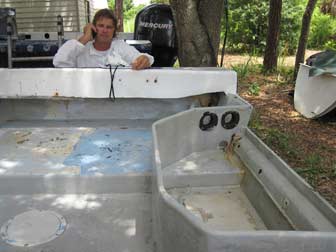
These boats have to be ready for the 2012 whale watching season, but they are also going to need to be filled with people. When customers call to inquire about whale watching tours, they probably expect that Captain Gene is in an office with a computer and some nautical memorabilia on the walls, but the reality is a bit different this year. Here he is in the Tyvek Suit, taking a break from cutting the bench away to field some questions from a potential customer.
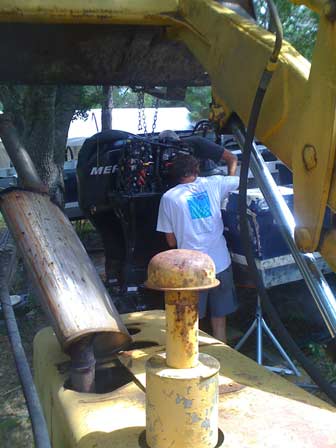
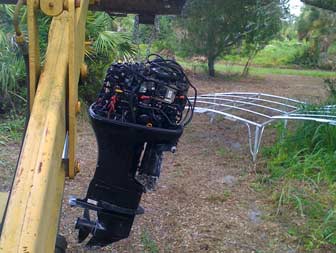
This was another of many times it has come in handy to have a neighbor who will lend me his endloader/backhoe with forks on the loader bucket. Yes, the rusted out exhaust muffler is hanging at a funny angle and emits a choking cloud of diesel smoke, but who looks a gift horse in the mouth? It will pick up a 400 lb engine, and as I told one guy who suggested moving them by hand, I'm not as strong as I look!

The easy way to carry a heavy outboard engine! Use your neighbor's heavy equipment! This one was off to a life on a commercial fishing boat. The last one to sell was headed for retirement aboard a pontoon boat, but it's back to work for this engine.

July 29, 2011
Removing Bench and Pressure Washing
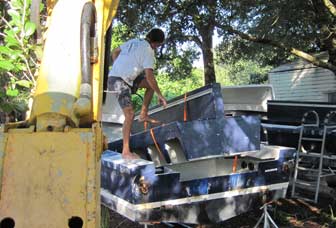
This day began with more heavy equipment fun, as we used the backhoe to drag the heavy bench seat assembly back onto the motor well of Pec. As an amateur backhoe operator, I try to be very slow and careful, but this time I put a little nick in the side of the boat. When you put a "little nick" with a backhoe, it's several inches long and half an inch deep. If the boats did not already have far more serious problems, Gene might have been more alarmed, but he just looked at it and said one more...
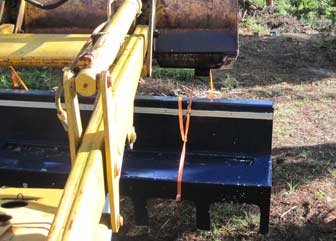
And this is how you move a heavy seat around the yard! Once we got it back far enough on the boat for the endloader forks to reach a pair of straps, plucking it off the boat and setting it on some blocks was quick and easy. Having slid that seat around on the deck, I did not want to try to carry it by hand. It is probably possible, but hard work and a good way to get someone hurt.

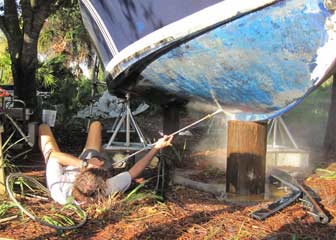
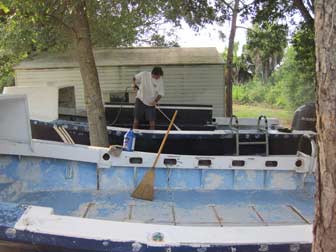
After moving the bench seat, I left to help out with the Charlotte Harbor Community Sailing Center Kids Camp Week and missed a good portion of the next phase. I came home to find that Gene had rented a high powered pressure washer and blasted both boats, causing them to change colors. The formerly black bottoms came out blue, and the formerly gray interior decks came out light blue. The interior of the hard dodger on Pec came out bright and shiny white, but the paint in the same area on Fluke just fell off in large sheets when hit with the pressure washer. Gene collected an entire 5 gallon bucket of paint chips.

July 30, 2011
More Pressure Washing Boats
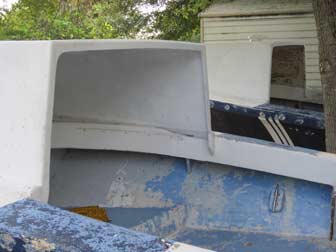
The pressure washing continues. This picture shows what happened to the insides of the hard dodgers under the pressure blast. The one over on Fluke is down to bare fiberglass in patches.
A closer shot showing the hard dodgers and the amazing color-changing boats. As you can see, Pec has been white, light blue, and gray on the interior at various times, and some paint of each color stayed on through the pressure washing.
The boats were completely pressure washed by the end of the day, but the machine did not have to be returned until Monday morning, so Gene went home to use it on his house. The major boat surgery is about to begin.
Leave a Reply
You must be logged in to post a comment.