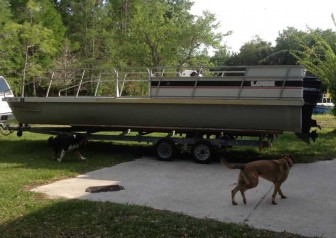
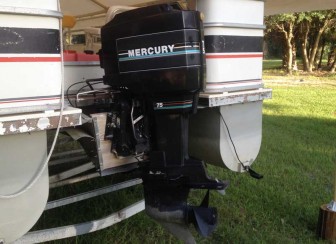
We bought an old 24 foot Lowe pontoon boat from a local fishing guide. He had coated the pontoons with Steelflex coating, replaced the deck with 3/4" ply, added a small center console and 20 gallon plastic fuel tank, and powered it with an old 75 hp Mercury. His intention was to run kayaking fishing trips and eco-tours, but the project languished and the boat sat for a year or so before we bought it.
The old Mercury ran great and pushed the boat at 22 knots and we decided the boat could be lots of fun with a few upgrades. So it begins...
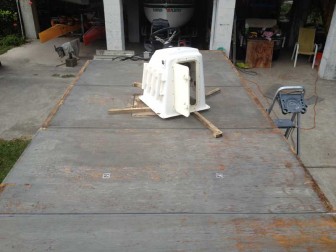
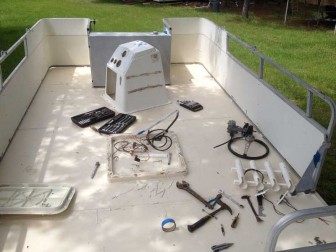
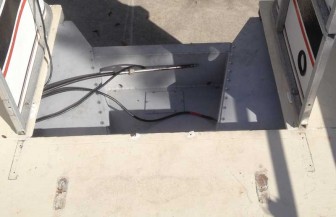
The deck paint had started peeling up in little latex curls, giving a shag carpet appearance at first glance. Step one was to repaint the deck. I removed the fuel tank and railings but did not feel like disconnecting all the cables and wires so I just unbolted the console from the deck. I was able to rotate it around the cable cluster enough to paint underneath it.
The two front pieces of plywood needed replacement and I filled and sealed a bit of rot in other pieces with epoxy, but overall the deck panels were in decent shape. I used Behr porch and deck paint and sprinkled some glass beads in the top coat for nonskid.

The first addition was a new 18' double Bimini top set with connector panel. We bought the NorthStar Products bimini top from Amazon and are very happy with it. During installation on a Saturday morning, I had a question about the geometry of their diagram. I emailed the company, not really expecting a response until Monday. A response arrived a short time later. I did not realize it at first, but the unfortunate worker who drew the duty of responding to customer inquiries early on a Saturday morning was the President of the company. Yes, it is possible to manufacture in America at a competitive price and offer good customer service. NorthStar demonstrated all of those things in our case.
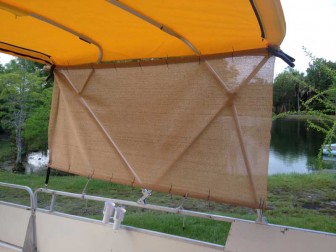
The Bimini top works great unless the sun is low enough in the sky to shine underneath. At left is my first attempt at a solution to that problem. I wrapped some mesh fabric from the Home Depot garden department around PVC pipes, secured with tie-wraps, and used big spring clamps at the top and ropes at the bottom to secure it. I plan to make at least one more like it.

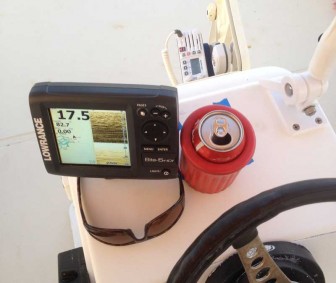
Next up: a GPS chartplotter with fish-finder sonar and a VHF radio with whip antenna. I installed the chartplotter on top of the console and hung the VHF and its microphone holder on the inside of a deck hatch that had been installed as a front door on the console.
My wife did not like the center console layout and I found the console itself a bit too small, so I knew these installations would be temporary. We were already making plans to replace the console with a side-mounted one and get the fuel tank off the deck. We bought the boat with the intention of repowering it, and as long as you're going to replace the console, engine, and almost everything in between, why not install a new motor well and fuel tank at the same time?
And so the mega-project begins...
The first step was to get rid of the old Mercury 75. We sold it to a neighbor kid who is using it on a small flats boat. The previous owner had reinforced the old motor well and replaced the wood before mounting the engine, but I was not happy with it. The mostly flat aft section of the well would slap when cruising in chop and I was not completely certain of the structural integrity.

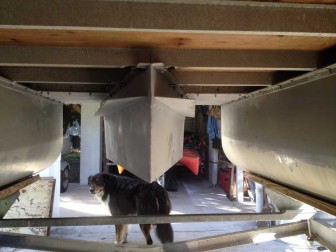
I got the idea that the new engine could be hung on a new center hull, a bit larger than the old motor well, with a built-in fuel tank and a pointed bow to take the chop. The new section would provide some additional flotation aft, improving the trim attitude at rest, but if set high enough it should mostly clear the surface when cruising and have little effect on trim attitude. I asked a local welder whether he could accomplish all this and he agreed to give it a shot.
At right is what he produced. Incorporating a fuel tank turned out to be too complicated, so it's just a watertight hull with a pointy nose and a motor well on the aft end. It is bolted into the holes used for the previous well and has somewhat larger spray deflectors. Luke the Cowdog approves.
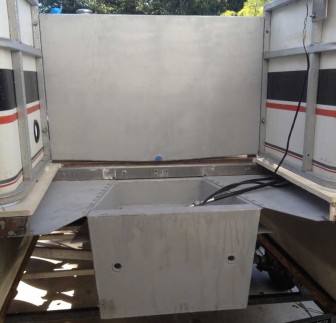
The motor well has drain holes on each side for self-bailing and a plate to provide access to the lower engine mounting bolts. The new fuel tank bolts onto the railing and deck. It is only 8 inches from front to back so it takes up considerably less deck space than the old one. We hope that having a tall fuel tank between us and the engine will dampen noise somewhat. Estimated capacity is 35 gallons. We will find out the exact number when I fill it.

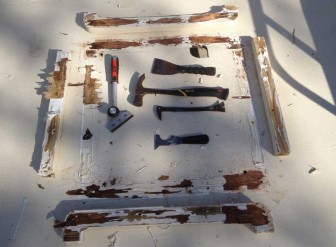
The old console had to go, but still had the steering cable and helm attached, not to mention various hardware that I wanted to transplant to the new one. Prying it off the pieces of wood that had supported it and stripping all the hardware turned out to be a pretty easy project compared to removing those four pieces of wood.
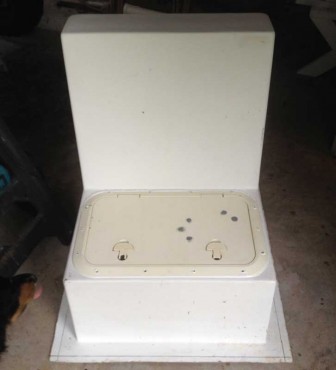
I found an old console on craigslist that had never been installed on a boat. It's a bit larger than the old one and has a front seat. I removed the deck hatch/front door from the old console and it became the seat hatch on the new console. It has five grey spots on it because I filled the old VHF and microphone mounting holes with stick epoxy. It has aluminum powder in it, giving the grey color along with some additional strength and UV resistance.

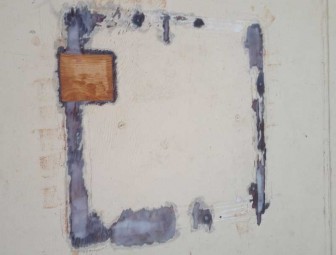
The results of removing the old console supports are shown at right. I think I used 3M 4200 and it really stuck to that plywood! I was able to cut and pry most of it away, but some pretty good sized pieces of the plywood deck came up too.
As long as I was into deck repair mode, I decided to fill the old fuel tank mounting holes and drill some oversized new ones to fill with epoxy. While I was at it, I filled the two bolt holes that had been used for the aft railing section (now replaced by the fuel tank) with new bolts. Getting the nuts onto the ends of those bolts in the small space between the new motor well and the deck was tricky. I had to put some blue tape across a ratchet wrench so it could hold the nut then use it to reach the bolt and catch the threads.

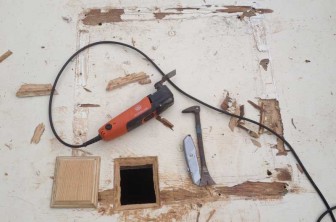
There are probably better ways to fill a largish hole in a plywood deck than the one I chose, but none within my imagination or skill set. I used the Fein Multimaster to freehand carve an almost-rectangular parallelogram with (more or less) 45 degree beveled edges. I measured the resulting hole, went to my table saw and cut a slightly larger rectangular piece with beveled edges, then returned to the boat and carved out the hole in the deck until the plug fit. More or less.
I went around all the areas of torn up plywood with a wire wheel to strip nearby paint and loose material so that I could fill those areas at the same time the patch was glued in place.
I got underneath the boat and put blue tape on all the old bolt holes so that epoxy would not run out. I taped a piece of wax paper to the underside of the deck where the rectangular plywood patch was to go. I mixed up some West epoxy and injected it into bolt holes, then painted all the bare wood and the beveled edges of the plywood patch with it.
The next batch of epoxy, applied immediately afterward, was thickened with Cabosil to allow filling and fairing all the gouges I had put in the deck in the course of removing the console.
Coming in the next installment in this series, the deck will be repainted, the new console will be fitted with access doors and helm, and the deck will get a brand new hole for the cables for the new engine.

Leave a Reply
You must be logged in to post a comment.