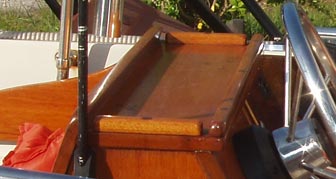
 A "little morning project" to replace a bracket for the outboard steering arm ended up involving complete disassembly and revarnishing of the mahogany console on my Boston Whaler.
We had some problems with the 70 hp Mercury that came with our old 15' Boston Whaler, and decided that it was time to repower the boat. Not wanting to spend the money for a new engine, we bought a rebuilt 1989 Yamaha. When I went to pick it up, the guy who sold it to me pointed out that the bracket that holds the steering arm to the front of the engine was badly rusted and near failure. He had fashioned a primitive replacement bracket, which he gave to me.
No problem, I'll just install that after I get home... a little morning project. Those three words strike fear into my wife's heart, because inevitably my "little morning projects" wind up involving every tool I own and maybe some that I rent, require at least two trips to town, and usually wind up finished weeks or months after the onset of the project. I couldn't see how a little steering bracket replacement could possibly spiral out of control, and set about replacing the bracket the next day.
A Rusted Nut, and a Mission to Replace It
The first thing I noticed when removing the old one was that one of the nuts that held it on was completely rusted away. That's why they call that metal stainLESS steel, not stainPROOF steel. I could see that the bracket would need a bit of further work before it fit, and my friend Steve offered to run to the store to get a replacement nylon lock nut. I sent him to our local Ace Hardware, which has an excellent stainless collection and a helpful staff, and I sent the surviving nut with him to ensure a match.
While he was gone, I got out my metal cutting wheel and trimmed the bracket a bit to provide clearance for the steering arm and for the bracket to swing over the motor mount. I also trimmed the edges off of a few large washers so that I could use them as spacers to get a little extra clearance for the steering arm. I installed it for a test fit, and found that even with the modified washers, it still did not have adequate clearance. I took it off again to bend the bracket a little in the bench vise.
About that time, Steve returned from the hardware store. He had two candidates for the replacement nut. That's not a good sign. I wanted an exact match, not two that were close! I tried them both, and neither one would thread onto the studs on the front of the engine. Sigh. Off he went to try again.
I bent the bracket to what I thought would be a good angle, and while I had it off used the grinding wheel and a file to clean up some rough edges from the cutting. It turned out to need a bit more bending, so I repeated the process. Finally I was ready to put away the metal working tools and wait for Steve to come back with the right nut.
He returned again, this time with a couple of metric candidates. What is going on here? He had the nut with him, and just needed to get one exactly like it. How is that so difficult? He called a Yamaha dealer to find out.
The mechanic at Gulf Coast Marine in El Jobean told him that what we needed was a special nut, not a normal standard or metric size that you might find in a hardware store. It was an hour's drive away, but they had two in stock, priced at just over $14 each. $14 for a nut? Made me kind of glad I was working on a homemade bracket. If the nuts to attach it are $30, they probably want hundreds for that bracket. Oh well, that's boating. Off Steve went on a journey to get the special nut. My "little morning project" was already well into the afternoon, and it seemed less and less likely that we would test drive the boat that day.
This time he returned with the right nut. After cleaning up the threads a bit from where the old one had rusted away, we were able to connect the steering to the engine properly. There was no time for a test drive, so we put it off until the next day.
The Steering System Had To Go
When we tested it out, we discovered that the Teleflex Safe-T no feedback steering cable and mechanism had been damaged when trying to free it up from the old engine. I had tugged on it pretty hard, and evidently caused some damage. It would steer normally most of the time, but sometimes the anti-feedback lock would refuse to disengage when you reversed steering direction with the wheel. It took a good jerk to get it free, which made maneuvering in tight quarters dangerous. I never knew when it was going to turn the engine and when it was going to fight me. So far, I had won all the fights, but I didn't know when that might change...
That steering system had to go, and I stopped by Land N Sea on the way home from work the next day and got a replacement. In order to get the old steering system out and install the new one, the console and mahogany side rail on the starboard side had to come off. It had been about 8 years since I had varnished the wood (see my earlier article about my Whaler upgrades), and even though the boat stays under a canvas boat cover and is parked under a house, the finish was looking pretty tired and scratched up. I had sealed each screw carefully when installing them the last time, but I could see that rot was starting to take hold around a few screws.
My "little morning project" was already an epic spanning several days, and was now starting to spiral seriously out of control. Of course there was no way I was going to put the wood back on the boat without addressing the rot, resealing with epoxy, drilling the holes back out, and putting a few coats of fresh varnish on everything. Off came the helm bench, bow locker cover, and port side mahogany rail.
The swivel bases on the seats we have on our helm bench were ordinary painted steel, and I had treated them with LPS-3 corrosion inhibitor and some heavy grease prior to installation 8 years ago. I always rinsed them after salt exposure, but they were still badly rusted when I pulled them off. I stopped by West Marine the next day and found that they had stainless ones. They were a little expensive, but at least they should hold up better and turn more smoothly after a few years.
Several days of sanding and varnishing ensued, and I was running out of time before my annual Memorial Day party. The disassembled boat and all its parts and almost every tool I own were scattered in my work area like a small tornado had hit, and I needed to completely clear the area out and pressure wash it. Working mornings and evenings, I got a few coats of varnish on both sides of everything. Before the final coat, I cleaned out the holes where the wood had started to deteriorate, taped off one side and filled each with a pool of epoxy. Once the epoxy cured, I cleaned it up, redrilled the holes, and put on a final coat of varnish. Time to reassemble everthing — only a couple of weeks into my "little morning project."
First the seat bases had to be mounted to the helm bench, then the seats bolted onto the bases. That part went smoothly, and the helm bench was placed in position. It is held by cutouts in the two side rails, but is not actually attached to the boat. Now it was time for the side rails, which meant the new steering system had to be installed.
The steering arm was a bit difficult to thread through the engine bracket due to hull clearance problems, and once that was in, the real fun began. The steering cable had to go through a hole in the mahogany side rail, then the side rail had to be attached. I put some 3M 4000 on all the holes in the hull, then put some more on a couple of the holes in the side rail and drove in two screws just until they poked out the other side. The trick then was to get the steering cable in place along the side of the boat and slide the side rail down it until the two screws found their respective holes. It was a bit of a messy struggle, with the steering cable fighting us like an angry snake and caulk getting where it doesn't belong, but we got it on. The port side rail was a lot easier, then it was time for the console.
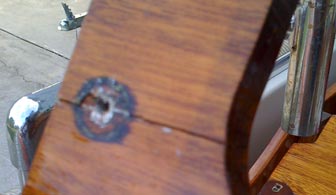
 Here is a picture of the crack.
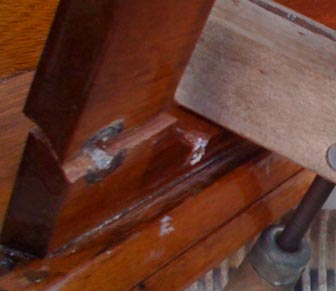
 The crack spread open.
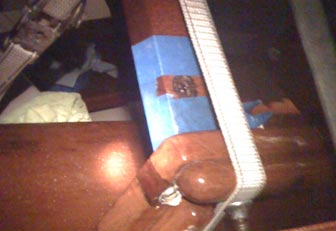
 The crack clamped shut.
The console is held by three screws into a floor cleat along the port edge, two screws driven vertically into the side rail on the starboard edge, and five more driven through the forward and aft faces of the console into wooden cleats hung on the side rail. After a bit of jockeying around and smearing caulk, we finally landed the console in position and got a couple of screws in the edges to hold it. I was tired and running out of daylight, but could at last see the end of my little morning project approaching. All that remained was to put in the other 8 screws and install the bow locker cover, and I would be done!
Disaster Strikes!
It's never that easy. Remember those holes I repaired with epoxy and redrilled? Apparently, I missed the lineup on one of them. I was driving in one of the screws, and it felt a bit tight as it went in, then POP! The edge of the console cracked! D'oh! I didn't have time to repair it, so I just put it together with the crack in it and put that repair on the top of my post-Memorial Day project list. It was kind of depressing completing the installation, putting on the steering wheel and the cover plates, knowing I would just be taking it all apart again soon, but I had no other choice.
When I got back to the little morning project a week or so later, I was wondering exactly how I should heal the crack in the wood. I could see that some caulk had made its way into the crack, and the crack ran right through a place where I had previously repaired rotten wood by drilling it out and putting in a mahogany dowel. I wanted to just clean it out and put some epoxy in there, but wasn't sure that would be practical. On advice from my "panel of experts" I considered cutting out the crack and laminating in a new piece of wood just to avoid cleaning out that crack, but decided I would try cleaning it out and prepping it for epoxy. It turned out to be easier than I thought when I figured out I could use a wood clamp to spread the crack open.
The caulk wasn't in there as deep as I thought, and with a small file and some sandpaper I cleaned it all down to fresh wood and glued the crack with epoxy. I could not directly clamp the crack closed, so used a combination of a clamp and a ratchet strap wrapped completely around the console to hold it shut while it cured.
Once the crack was fixed, I still had to fix the problem that caused the crack in the first place: the misaligned hole. I filled that back in, along with another one that was not quite right, and drilled them back out. All the holes lined up properly, and this time I drilled all the screws all the way in on the test fit, a step I had omitted in my rush to finish before. Once it was all reinstalled with proper sealant, my "little morning project" to replace the steering bracket (remember the steering bracket?) was finally done.
Leave a Reply
You must be logged in to post a comment.