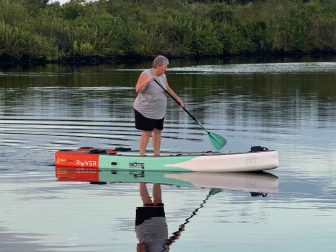
We bought a pair of AeroBOTE Rover inflatable SUP/MicroSkiffs so that we could bring boats along when we are towing our travel trailer. We tried one out on Shell Creek as soon as we got them home.
My dog Starr never wants to be left behind so got right aboard.
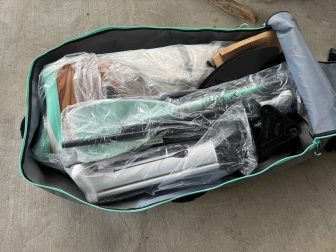
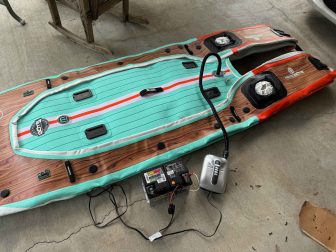
One of the BOTE boards had been inflated just for pictures but never taken outside. The other was new in the plastic bags. Both are 2021 model year boats. They have standard HIN numbers that indicate one was manufactured in December of 2020 and one in March of 2021, so it's nice to know these were made when everything was running smoothly in the world.
The guy who sold these to us threw in a 12 volt inflation pump. The BOTE's come with manual pumps.
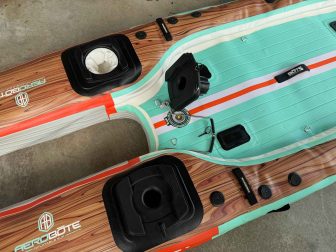
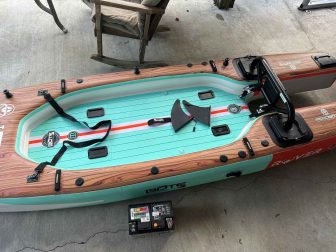
If you're going to mount an outboard, these sockets must be inserted into the hull during inflation.
The U shaped metal clip locks the socket into the hull and a black plastic retaining pin holds it in place.
The outboard motor mount inserts into the plastic sockets and there are two straps that go through D-rings on the cockpit sole to make sure it stays in place.
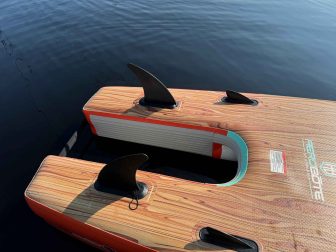
Also shown are the two fins that insert in slots in the bottom of the hull. It's hard to paddle straight without these but they are not needed if using an outboard. There's also a strap up forward that I guess could be useful for stability but we're getting hard grab racks.
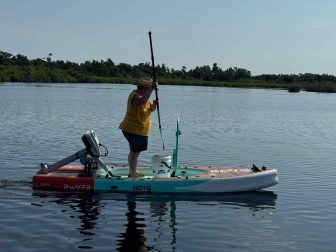
We have an Epropulsion Spirit electric outboard motor for our Picnic Cat sailboat and it works great on the BOTE. We want to try towing one BOTE with the other but ran into a little problem with that plan.
Disaster! I blew up the second BOTE! I had left them both mostly inflated and mostly in the shade but as the afternoon wore on, this BOTE was in too much sun and the seam exploded due to overpressure. The other one was in more shade and was fine. I began researching how to repair inflatable SUP seams. I'm not the first to explode a seam, it seems...
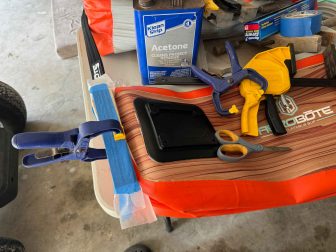
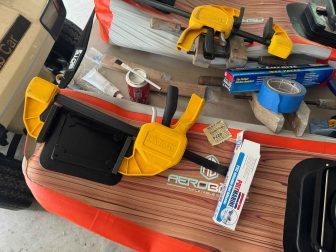
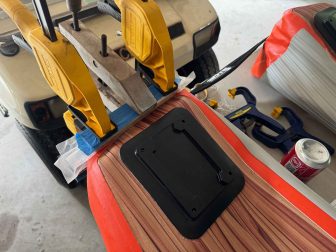
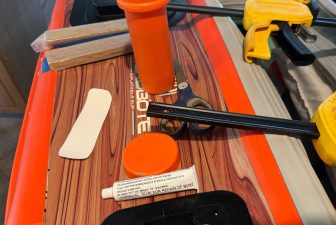
If you're reading this because you've blown up an inflatable boat seam, you're going to need scissors to trim fabric strands, acetone and 220 sandpaper to prep the surfaces, wood strips covered in wax paper, and clamps.
The BOTE repair video recommends using HH-66 glue but I could not find it locally so went with POLYMARINE PVC Inflatable Boat Adhesive sold at West Marine. They make a two-part version of this cement but I wasn't sure how to accurately mix it at 25:1 so went with the one part kind.
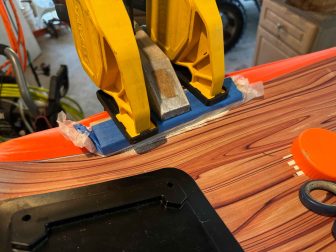
It's a contact cement so you apply a layer and then let it sit for 20 minutes before applying a second layer. Not wanting to hold it open that long, I figured out a way to use one of my clamps.
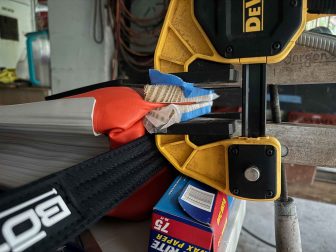
After the second layer of cement was tacky, I pressed the two parts together by hand then used wax paper-covered wood strips to create even clamping pressure along the seam.
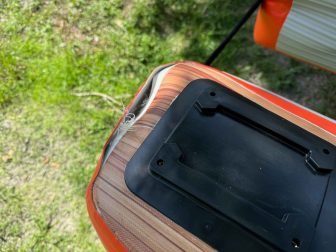
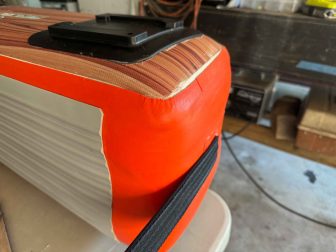
None of the online videos of SUP seam repairs seemed to cover a complex situation like this one, with corners and a carry strap and a lower hull section and connecting fabric. They all seemed to have pretty straight and simple seam blowouts. This one wasn't as easy to clamp and I was wondering if it would work when I looked at it from the side.
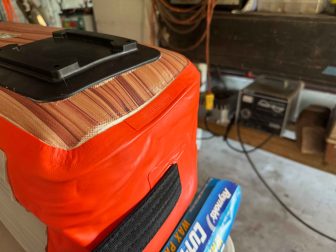
The resulting wrinkle in the fabric made a pop when it let go as I inflated the hull to test the repair.
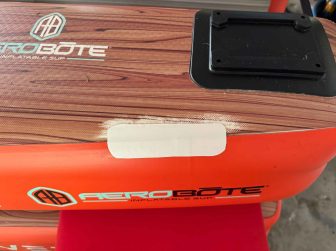
I let it stretch out for a while at 5 psi before inflating it to the minimum operating pressure of 10 psi. The white area shows that I did not get the alignment quite right, but I got it wrong in a way that provides a little extra slack in the fabric around my repair. I guess that's better than the repair being under extra tension. It held pressure over night.
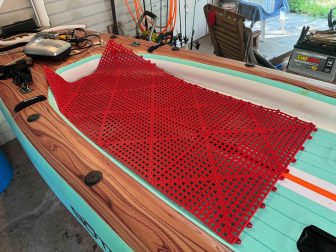
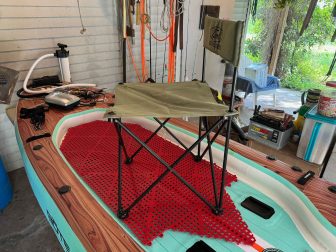
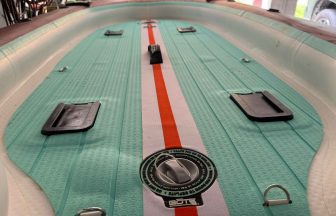
One of the repair videos that I watched had a comment from a guy wishing to buy new foam deck padding for his BOTE because his dog was tearing it up. I decided to put some Dri Dek panels down to protect the BOTE deck from Starr's claws.
I attached the cut off corners to the aft end to provide a little more space when I bring along my folding chair.
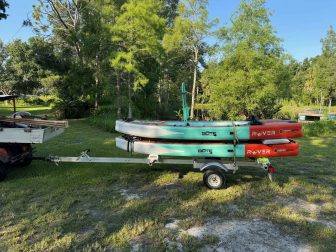
I unloaded my Hobie Tandem Island from its trailer and with a pool noodle here and a bit more padding there, it's a double stacked BOTE trailer. Good enough to get them down to the creek for a test run this morning.
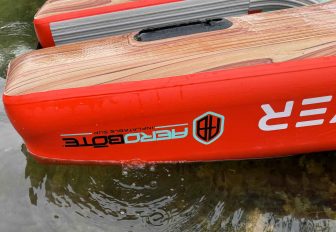
I did not mention it, but you can see in some of the photos above that the strap across the transoms on the BOTE I repaired is upside down. Still works fine and quality control slip ups happen. I wasn't going to mention it but this morning I went to mount the fins in my boat to paddle it and found that one of the fin mounts was installed on the boat backwards by the factory. Really, BOTE?
We bought BOTE Grab Rac bars for both boats but only one came in time for the test ride today. It can be moved to an aft mounting position easily to get out of the way of paddling but it has to be mounted forward when using the motor.
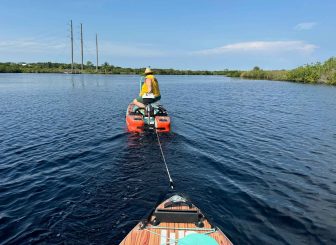
The big test of the day was how it works to tow one BOTE using the Epropulsion motor on the other BOTE. It works great! I didn't measure our speed but set at 100 watts both boats went upwind nicely. At 400 watts they seemed to go a bit faster with a great deal more noise.
UPDATE: My seam repair held 10 psi over night and worked through our test but then my boat began slowly losing pressure. I kept wetting the seam repair with soapy water, listening, and looking and could not see where my repair failed. But what are the odds of ANOTHER leak just happening to appear right when I'm testing my repair? Very low. I decided to dip my repair in my pond to look for leaks and this picture shows the result. The PORT side of the boat bubbling vigorously! I repaired the STARBOARD transom. My repair didn't bubble a bit.
This is especially puzzling since I'm certain the boat had only been under a maximum of 10 PSI during the entire time I was testing my repair, so overpressure can not have caused this new problem.
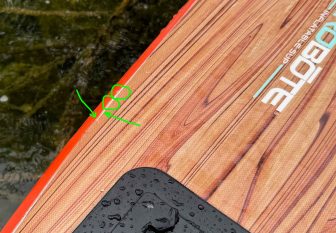
I flipped the boat over and found that there are actually four little leaks. I circled the two that have bubbles in the pic and made arrows to where the other two are. I'm not sure how to fix this but have emailed BOTE to ask. They did manage to have a robot and a human respond to me over July 4th weekend, so that's more customer service than I really expected on a holiday.
UPDATED UPDATE: I decided to try putting a patch over the four tiny leaks that I found in the seam of my BOTE. I later learned from a BOTE factory rep that it would have been a good idea to apply PVC Stitch brand liquid glue first. Another thought that occurred to me too late was to set the air pump to deflate and have it try to suck glue into the holes. If I could turn back time...
But you can't turn back time once you've done this. Or maybe you can? I've emailed to ask about whether patches can be removed.
As for whether this patch needs to be removed, I haven't decided. It leaks out both ends and I can hear it and see it with soap bubbles. On the other hand, it now seems to lose about 1 PSI per hour. The chances of my wanting to be out on this thing for longer than four hours are remote. I know it holds 14 PSI and if it leaks down to 10 by the time I'm done for the day, do I really care? I'm not at all sure I do.
I may not run out of things to pester BOTE about, starting with the foam deck on my boat. I emailed to ask about those bubbles.
Upon closer inspection of both, my wife's boat shows that the factory could get one of these right. It doesn't have the flaws mine does. The backward fin is the most glaring but there are other things. The upper and lower air chambers aren't aligned. The sides aren't quite straight and my boat is wider than hers. Various seams are not quite straight. Making one of these takes skills. Whoever made my wife's boat had them, whoever made mine didn't, and quality control missed the BOTE.
All that said, I'm still very happy with these boats, mostly because my wife is happy with hers and because we paid about what hers is worth for both of them. If we were retail customers who bought 2024 boats from a dealer and one was like mine, I'd want them to take it back. That's not our situation. We bought these from a guy on Facebook who said he bought the inventory of a closed dealership. I can deal with the boat I've got, and now I know more about fixing them if necessary.
Some video of the repair:
And the Tow BOTE Test:


Leave a Reply
You must be logged in to post a comment.