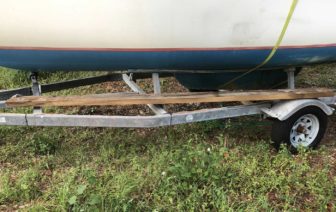
When the stray goat Julie B followed me home, she did it on my wife's trailer. The bunks were just the wrong distance apart and I didn't feel like moving them. As a result, one runner broke free from the bottom of the boat and a piece of it was lost. The other runner was loose but resisted my attempts at removal. This situation left me stumped for a while in two ways: I wasn't sure what kind of wood to use to replace the broken one and I wasn't sure I could remove the intact one from the boat without harming the boat. A friend suggested removing it with a planer or angle grinder but that sounded like a lot of work, a lot of dust, and then I'd have to replace two, not just one.
The first problem was solved when I called my friend Dennis to ask his advice. He told me he had salvaged some wooden bunks from a boat lift and then discovered they were an exotic mahogany, way too nice to be used for boat lift bunks. They were 10' 5" long, 8" wide, and 2" thick and he told me I could take a slice to make a new Goat Island Skiff runner. The unbroken one on the boat was 10' 2" so this would work! Speaking of work, it was quite an effort to get this bunk up on the racks atop my van to bring it home. My guess is that it weighed about 80 lbs, maybe a bit more.
I had to run it over my table saw several times, cutting about a half inch each time, after my attempt to cut it in one pass resulted in a stopped and smoking blade. The remaining piece is shown in the pic at right.
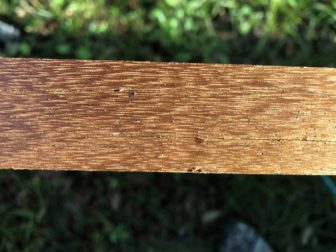
Based on my description, a few people online have taken a guess at what kind of wood it is. Because it has a greenish tinge when viewed in sunlight and the sawdust turned more reddish when wet, the most likely guess seems to be a wood called "greenheart." I've never heard of it but it's beautiful, strong, hard, and rot-resistant enough to live on a boat lift for years. After cutting off a slice, I brought my brother over with his power planer to shape it down to match the existing runner. Picture of the grain at left.
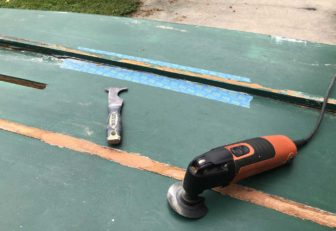
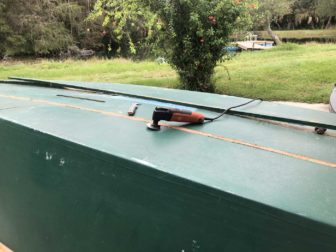
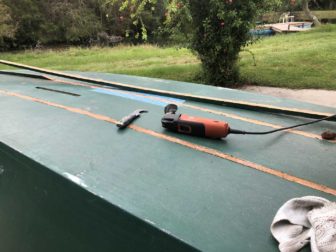
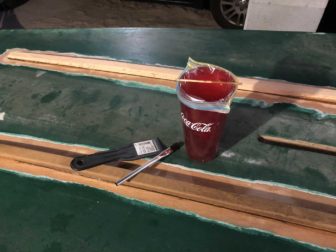
After my attempt to pry the runner loose with a paint roller tool resulted in the glue removing a small gouge from the plywood bottom, I brought out the Fein Multimaster to carve away the glue fillet. I was reasonably successful at cutting only glue and no wood.
Only the few feet in the middle of the runner were still connected to the hull by this point so I used the broken runner from the other side and another chunk of wood to keep some pressure on the glue joint as I cut and pried my way along.
This approach got the runner off pretty quickly and with no further damage.
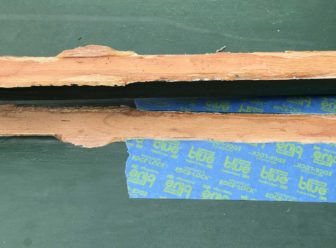
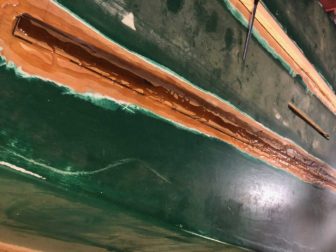
At left is a shot of the little gouge I took out of the bottom when prying. I figure I'll put a bit of fiber in there when epoxying it back together so it will be stronger than just a puddle of glue.
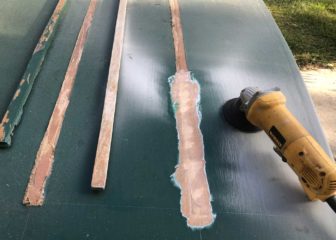
I used a grinder to remove the old glue, primer, and paint from the area where the runners are to be reattached.
I learned that I can tolerate running a grinder for about an hour before I become sloppy and need a break.
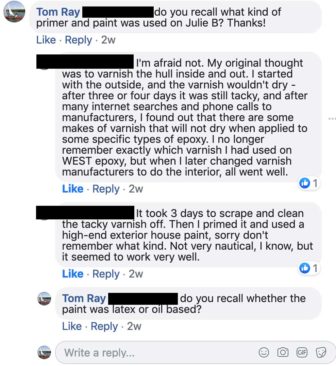
Update 1/4/20: I got a little info from the original builder of Julie B on Facebook but still don't know what kind of paint was used.
When the stray goat Julie B followed me home, she did it on my wife's trailer. The bunks were just the wrong distance apart and I didn't feel like moving them. As a result, one runner broke free from the bottom of the boat and a piece of it was lost. The other runner was loose but resisted my attempts at removal. This situation left me stumped for a while in two ways: I wasn't sure what kind of wood to use to replace the broken one and I wasn't sure I could remove the intact one from the boat without harming the boat. A friend suggested removing it with a planer or angle grinder but that sounded like a lot of work, a lot of dust, and then I'd have to replace two, not just one.
The first problem was solved when I called my friend Dennis to ask his advice. He told me he had salvaged some wooden bunks from a boat lift and then discovered they were an exotic mahogany, way too nice to be used for boat lift bunks. They were 10' 5" long, 8" wide, and 2" thick and he told me I could take a slice to make a new Goat Island Skiff runner. The unbroken one on the boat was 10' 2" so this would work! Speaking of work, it was quite an effort to get this bunk up on the racks atop my van to bring it home. My guess is that it weighed about 80 lbs, maybe a bit more.
I had to run it over my table saw several times, cutting about a half inch each time, after my attempt to cut it in one pass resulted in a stopped and smoking blade. The remaining piece is shown in the pic at right.
Based on my description, a few people online have taken a guess at what kind of wood it is. Because it has a greenish tinge when viewed in sunlight and the sawdust turned more reddish when wet, the most likely guess seems to be a wood called "greenheart." I've never heard of it but it's beautiful, strong, hard, and rot-resistant enough to live on a boat lift for years. After cutting off a slice, I brought my brother over with his power planer to shape it down to match the existing runner. Picture of the grain at left.
After my attempt to pry the runner loose with a paint roller tool resulted in the glue removing a small gouge from the plywood bottom, I brought out the Fein Multimaster to carve away the glue fillet. I was reasonably successful at cutting only glue and no wood.
Only the few feet in the middle of the runner were still connected to the hull by this point so I used the broken runner from the other side and another chunk of wood to keep some pressure on the glue joint as I cut and pried my way along.
This approach got the runner off pretty quickly and with no further damage.
At left is a shot of the little gouge I took out of the bottom when prying. I figure I'll put a bit of fiber in there when epoxying it back together so it will be stronger than just a puddle of glue.
I used a grinder to remove the old glue, primer, and paint from the area where the runners are to be reattached.
I learned that I can tolerate running a grinder for about an hour before I become sloppy and need a break.
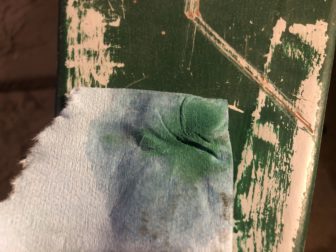
I rubbed some of the scratched paint with some denatured alcohol on a paper towel. Looks like it's latex paint.
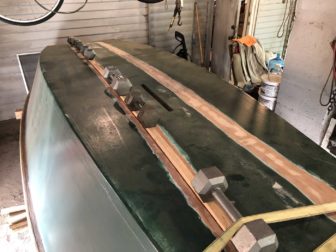
Update March 15, 2020: After many hours of sanding, I finally had the new runners and the bottom of the boat prepared for gluing. Gluing on the original runner went pretty well because it still had more or less the same shape as the bottom of the boat. I just put some weights on it and the runner surface was mostly squished against the hull. At the forward end, I wound up having to put a ratchet strap over the weight to make the tip of the runner sit against the hull while the epoxy cured.
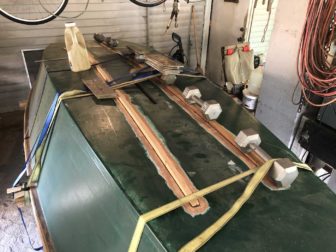
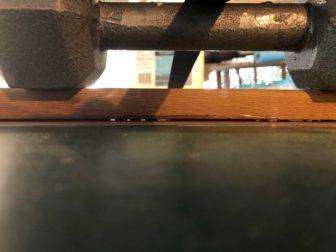
The new runner I made from greenheart wood was a whole lot less cooperative. It still very much wanted to be straight and not conform to the curve of the hull. I put a row of weights on it, which got it mostly to the right shape, then put a few ratchet straps over the weights to help push it down. When that didn't quite do it, I got a bunch of heavy metal plates and stacked those on top. I was running out of heavy things at that point and put a big jug of cooking oil onto one of the ratchet straps to pull it a little tighter. Even with all of those things, parts of the runner still did not quite contact the hull.
The picture at left shows some light coming through underneath one of the ratchet strapped weights.
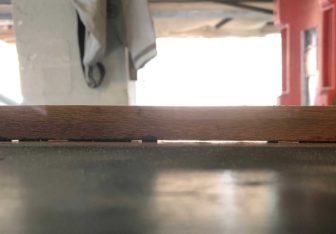
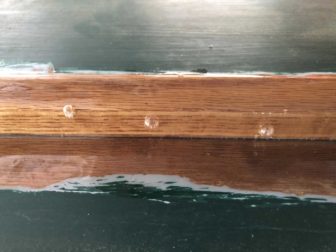
After the epoxy cured and I removed all the weights and straps, I took the picture at right, showing one of a few spots where the runner did not quite contact the hull. Now I'm wondering what to do about this situation. The gap is pretty small but I might be able to get the tip of a West Marine epoxy injection syringe into it. I'm concerned that injected epoxy would just run back out if I managed to get it in there. The other idea I had was to thicken some epoxy and try to force it into the gap with a putty knife but I'm not sure I could completely fill the gap. I plan to ask various online brain trusts what they would do, since I have little experience in these matters.
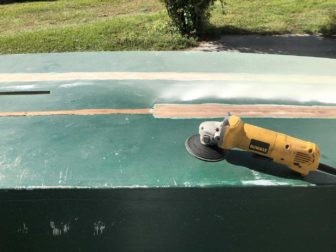
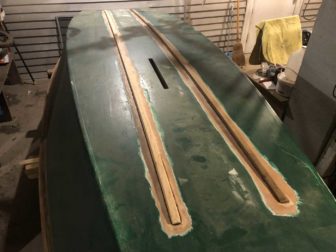
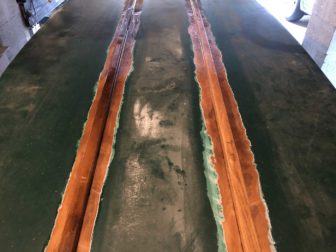
The picture at left shows both runners glued in place and raises my next question. I have never read the building plans/instructions for the Goat Island Skiff but I understand from following the Facebook group that the hull is to be covered with epoxy prior to painting. As the picture shows, I ground and then sanded off most or all of the old epoxy. Now I'm wondering how much of the exposed areas to cover with epoxy. Do I cover just the parts with exposed wood, or go all the way to the primer or maybe the top coat of paint? And how many coats are to be used? I'm off to ask around on Facebook and forums now.
Update March 25, 2020:
The designer of this boat, Michael Storer, and many other knowledgeable people, suggested putting thickened epoxy into a ziploc baggie, cutting off a corner, and sliding the cut corner into the gaps to squeeze the epoxy into them. Using a tiny flashlight shining from the back sides of the runners, I found that the original runner had some tiny gaps I had not previously detected. I used an appointment reminder card from my dentist to see whether I could get it into the gaps and could not. They were too tiny. I figured that meant I would have no better luck sliding a cut baggie corner into those spots so I went with another recommendation.
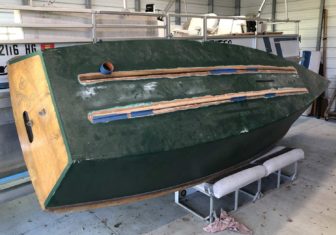
In the picture at right, the Goat is leaned up against my pontoon boat with the bottom sides of the runners taped up where the gaps are. I used a West Systems syringe to inject liquid epoxy into the tops of the gaps, relying on gravity to make it fill the spaces. This worked pretty well. In a couple of spots, the liquid epoxy managed to sneak past my tape barrier so I wiped it off and quickly put more tape in those spots.
I had not tried the baggie method before but it sounded pretty good for the next step: getting all of the mixed epoxy spread out on the runners and the surrounding bare wood quickly. That went very well.
After stirring the West System epoxy for three minutes, I poured it into the bag, kneaded it around a bit more, and a few minutes later it was squirted out all over the desired areas.
Not confident in my ability to get this right the first time, I did the two runners separately with a different mix each time to make sure I had time to brush it all over the repair area. This turned out to be unnecessary, as it took about an hour for the spread out epoxy to start to become too tacky to brush.
On the first coat, both runners blew up some bubbles in the epoxy as the wood heated up and the air in them expanded. The epoxy was still very wet at that point, so I just popped the bubbles with the sharp tip of my pocket knife.
On the second coat, applied after the epoxy was firm but tacky to the touch, the newly-fabricated runner showed no more bubbles. I figured this meant that the original runner would behave the same way. After brushing out the epoxy on that one, I took a lunch break and did some other stuff. When I returned, I found about 20 large, hardened bubbles in the epoxy. I'm glad this is the bottom of a boat that was never cosmetically perfect in the first place.
Yesterday evening I wiped down the cured epoxy with a wet detailing rag to remove amine blush. This morning's project will be to sand it a bit and apply the third coat. I'm a bit worried about the bubble spots because the second coat was bubbled up and this obviously means the first one didn't seal those areas completely, so if I get a good seal on the third coat, it will still mean only one coat is really doing the sealing instead of the recommended three coats. So maybe I should go for four or five?
So far, this project has made me glad there are so many good used boats around and I don't have to build them.
Leave a Reply
You must be logged in to post a comment.