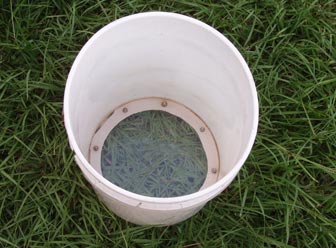
 The completed clear-bottom bucket

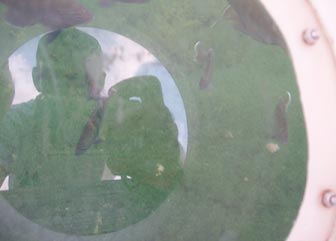
Peering through the clear-bottom bucket at the fish in my pond.
When searching for a good spearfishing area in the Bahamas, our usual technique was to look for some interesting-looking bottom features and then either send a person overboard to have a look or just spin the boat in a tight circle, making a slick on the water through which we could see the bottom. Both methods have their disadvantages. A diver in the water can only evaluate a small area, and it takes time to get the diver in the water and get him back out if the area does not look good. Also, the water might be cold. A boat-induced slick on the water can give you a decent look at the bottom, but the view won't be as good as a direct look from a diver. You might miss small ledges which contain lobster or fish.
Tired of these two techniques, my friend Gene decided to make a glass bottom bucket. Well, the bottom is not glass, but it is clear. You just set the bucket on the surface of the water, and you can look down through it and see the bottom.
To make the clear bottom buckets, he first acquired a few 5 gallon buckets. Don't try this with small or flimsy buckets.
He then marked a circle a couple of inches in from the perimeter of the bottom of the bucket, and used a jigsaw to cut out the hole. It is important to leave enough of a lip around the bottom to retain some strength and allow attachment of a clear piece of plastic.
The next step was to buy a sheet of acrylic and cut a circular piece just a tiny bit smaller than the interior diameter of the bucket. Acrylic (also known as plexiglass or by the trade name plexiglas) can be prone to shattering and/or melting if it is not cut with the correct saw blade. Use one designed for use on plastics. I have found that masking tape can help when cutting plastics.
Once the piece is fitted inside the bucket, drill holes all around the perimeter of the plastic piece, then use those holes as guides to mark where holes are needed in the remaining lip of the plastic bucket bottom. Once all the holes are drilled, you will need stainless steel bolts and lock nuts of the correct diameter and length.
Dry-fit everything together to make sure all the holes will line up, then take it back apart and run a thick bead of 3M 5200 marine adhesive sealant around the bucket bottom. Set the clear plastic sheet in place and tighten the bolts just enough to squeeze the sealant flat, but stop when you start squeezing sealant out around the edges.
Set the bucket aside to cure for at least a day, then tighten each bolt a little more to squeeze the acrylic tightly against the gasket formed by the 5200 sealant. Be careful and do not tighten it too much, as acrylic can be brittle and prone to cracking if over-stressed.
I have had my clear bottom bucket for over 15 years now, and it really helps to be able to take a quick, direct look at the ocean bottom when deciding where to anchor, fish or dive. Now I wonder how I ever got along without a see-through bucket.
Tips
- A clear bottom bucket can be useful when anchoring
- There used to be a product you could buy called a battiscope (from Trident) that was functionally the same thing as my clear-bottom bucket. However, that product is no longer made, and I can't even find one on eBay.
Leave a Reply
You must be logged in to post a comment.