August 9, 2011
Removing Bench, Deck, and Fuel Tank from Fluke
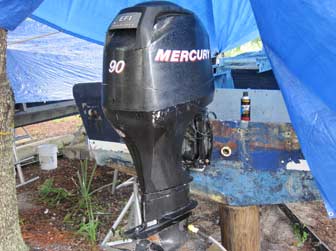
The first priority for the day was to test-fire the last remaining Mercury 90 hp outboard, since a potential buyer for it was coming later in the day. It did not go well. We had run that engine within the last couple of weeks, and it ran fine, but on this morning we got no life from the electronic fuel pump. Usually, you can hear the pump buzzing when you turn on the ignition switch, but it was silent. I checked a test port on the high pressure fuel rail and found that it did not spray gasoline all over me, which actually means the test was a failure, oddly enough. A quick blast with some quick-start spray confirmed that the engine was sparking properly and would run if it got fuel, but it was not. Gene called the customer to inform him of the situation and he just said to check back when it is working again.
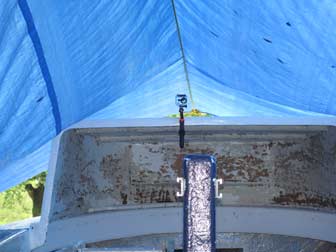
We decided to experiment with creating a time-lapse video of the day's activities with a GoPro camera that someone gave to Gene. This picture shows the GoPro mount secured to the hard dodger top with a spring clamp, ready to document the boat surgery. We were not at all familiar with the GoPro, and did not anticipate that the batteries would run out about halfway through the day, but it still captured a lot of the action. I filled in the parts at the end with a few still shots taken later in the day. Here is the resulting video:

The first step was to cut the bench seat on Fluke free where it was tabbed onto the deck using a sawzall. This went a lot faster than cutting off the tabbing with grinders over on Pec, and left a smoother deck to boot.
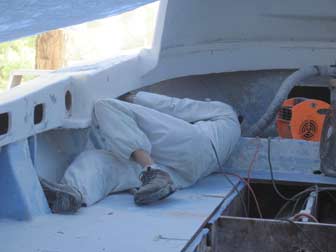
Getting the long sawzall with the long blade inside each compartment under the bench seats was a bit of an acrobatic feat, as you can see on the timelapse video, but the bench assembly was free from the deck in less than an hour. These benches are heavy enough that the two of us can just barely lift one off the ground, so getting it off the boat was going to be a bit of a trick. Enter the neighbor's backhoe again.

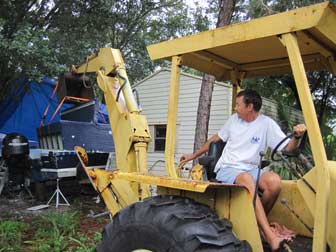
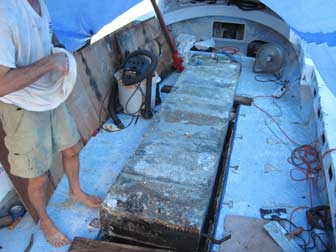
Removing the bench from Pec was fairly easy because it was possible to approach that boat from the side with the endloader bucket with forks on it and run ratchet straps around the benches and over the forks. That method would not work on Fluke because it has a shed on one side and Pec on the other, making it unapproachable from either side. Instead, we slid the seat back to the corner of the boat and used the backhoe arm to lift it off the boat. I put the backhoe arm on top of the bench and Gene strapped it securely to the bucket. Lifting it over the gunwale required every bit of vertical clearance the arm could muster, but it made it. Note to non-Floridians: just because you are operating heavy equipment is no excuse to wear shoes near boats.
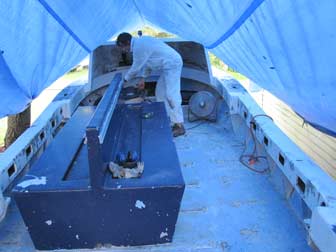
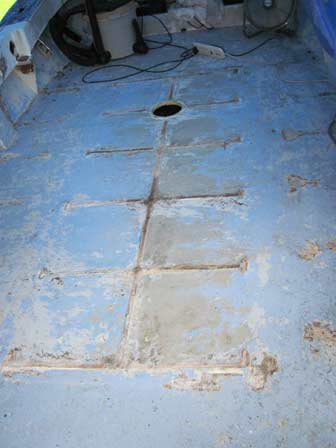
The deck of Fluke, ready for surgery. You can see the marks where the central bench seats were removed, and where the previously installed benches along the sides were removed. It is time to cut open the deck and pull out the fuel tank.

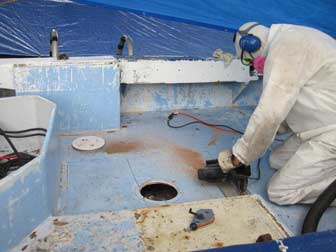
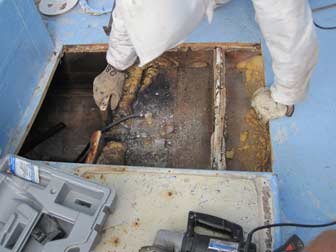
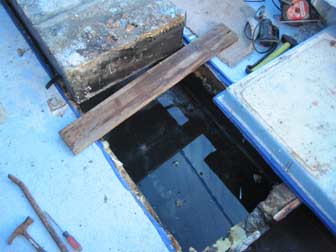
As we had done with Pec, we decided to cut out a section of the aft deck over the bilge and fuel tank first, then move on to the long cuts in the deck. Cutting out this section allows access to the area where the driver's deck overlaps the corner of the tank, and extending the hole back over the bilge will allow greater access to that area for working on fuel lines, bilge pumps and other pieces down in the bilge. The only other access is through a deck hatch in the motor well, shown on the left in the photo.
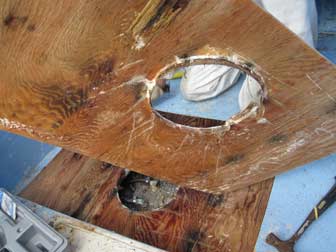
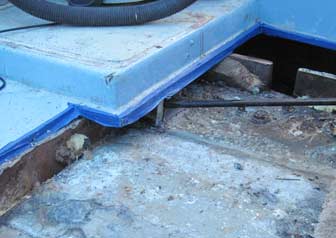
The plywood core around the deck plate above the tank had fared much better on Fluke than the one on Pec. You can see in this picture that a solid lip of fiberglass mat was laid around the edge of the hole, and that was still well bonded to the wood almost all the way around. It was a bit of a fight to get it free, which is why the solid lip is no longer continuous. The plywood below has a bit of staining here and there, but is in OK shape overall. The few spots where leaks or fasteners allowed water to intrude into the wood core are stained, but not rotted.

Once again the main cuts were made using the circular saw and the corners finished with the RotoZip using a cutting wheel. Pulling up the plywood gave us our first good look at the top of the fuel tank on Fluke. What a mess.
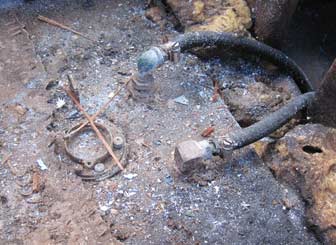
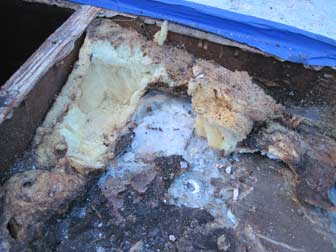
The fuel supply line fittings do not match on this one. Someone had a bad day that involved somehow cracking off the original aluminum one and the tank ended up with that curved fitting. The old sender is in marginally better shape than the one on the other boat, in that it has no open holes leading directly into the tank. Most of the foam on both boats is in great shape, but at the aft end of this fuel tank small areas of foam are soaked and some foam is just mysteriously deteriorated. If exposure to gasoline caused a problem, the other boat should have suffered from it even more, but did not. Something else must have gotten into this boat that did not react well with the foam.

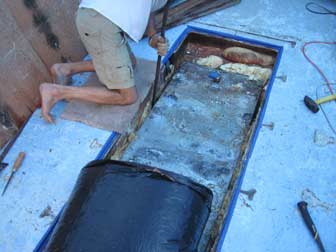
I missed all the fun of pulling up the deck and cutting the stringers underneath, but you can see it (and Gene eating lunch) in the time lapse video above. I arrived back at the site to find Gene prying loose the foam from around the tank. For some reason, the foam on this boat was bonded more tenaciously than on the other one, so it was harder to get big chunks to separate from the tank and wall and come out intact. I gathered up some foam chunks and put the trash bag in the air flow of the fan so it would stay open, making it easy to toss in pieces as they came free.
I decided to start in on the foam at the other end of the tank. The foam at the aft corner of the tank had bubbled over the top of the tank a bit, and that area seemed to be easy pickings for a pry bar. What I found underneath that foam on top of the tank was pretty scary. Corrosion corner seems an appropriate name for this little salt mine that was brewing atop the tank. Maybe salt is the agent that caused the nearby foam to deteriorate?

The stringers that ran across the tops of the tanks extend underneath the driver's deck a few inches, making one side very hard to remove. On Pec, the piece of wood was rotten enough to break loose, but this one was still solid and did not want to come off.
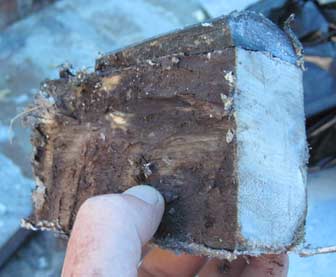
The piece finally splintered at the end and gave up clinging to that last piece of tabbing. This cut end shows the rubber strips that were used to isolate the fuel tank from the wooden stringers above. The same strips were laid in the bottom of the tank wells to allow foam to expand underneath the tanks.

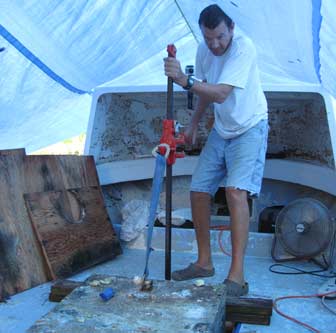
As we were picking at the foam around the tank, I kept staring at it and wondering how we could just pop it free of all that foam. I wanted to use the backhoe, but there was really no way to get it close enough. I kept trying to figure out a way to pry underneath the tank or something when it hit me: the farm jack! I had a farm jack right there in the shed, and it could be strapped to the tank's fill fitting and pop it right out!
My first attempt did not go so smoothly. I put the jack on a board spanning the gap in the deck just in front of the tank, hooked up the farm jack, and started pumping. When it came tight, I leaned on it a bit harder and we started to hear cracking sounds. I'm not sure what was breaking, but suspect it was my support board. The tank did not budge one bit. I went back to picking at foam for a while, then made a second attempt, this time with two boards to support the farm jack. A few pumps and a lean on the jack, and the tank came up.
We were able to jack and pry the front of tank up onto one of the boards that had been used to support the farm jack, then pick up the aft end and lay it on a big pry bar. That black water was some of the foulest smelling bilge water I have ever encountered. I could not wait to get it out of there just to stop the reek.

This tank had not had any recent problems, but it was not a pretty sight when it came out. The creeping crud was attacking it.
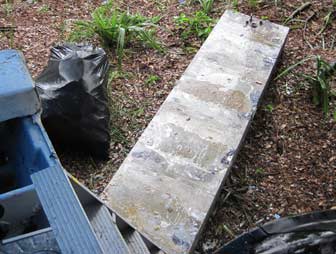
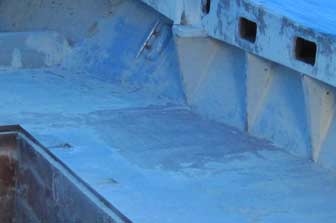
It's a blue, blue world on the boats these days, with blue tarps overhanging sky blue decks. We ejected the tank onto the ground, and in the normal daylight you can see various patches of corrosion on the surface. This one was not as bad as the other, but neither look like something that should go back in a boat.

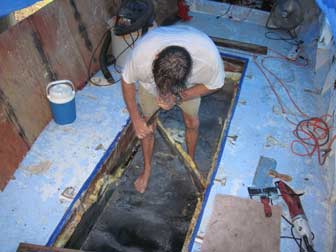
Once the tank was out, it was far easier to separate the foam from the walls with a big drywall knife and pry off sections. That part went pretty quickly, with Gene prying off chunks about as fast as I could bag them up.
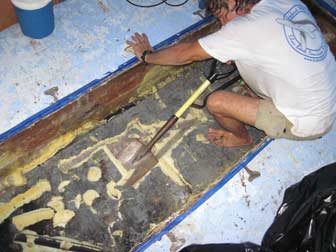
The foam on the floor did not want to come up as easily, and watching Gene plow channels through it with the pry bar, it occurred to me that he just needed a wider pry bar, like the flat bladed shovel I had been using earlier in the day. The shovel did a great job of lifting up big pieces of foam off the floor, and soon we had an empty compartment.

The fiberglass roving tabs that had been holding the stringers across the tank top had been cut with the sawzall earlier in the day, but there were still patches of material remaining on the compartment walls. Those pieces could be ground off, but cutting them free produces a lot less dust and noise. Most had a lifted edge someplace where it was possible to get a chisel or pry bar underneath and pop them off. Some of the tougher ones required hammering the chisel through with the mini sledge hammer. It always surprises me just how tough a thin piece of fiberglass can be.
The stringers had also been held in place by nails, which were now just rusty spikes sticking through the tank compartment walls, waiting to tear us up. They were hard to see and just long enough to do some damage. The Dremel Multi-Max tool with a metal cutting blade worked very well at cutting these off flush against the walls.

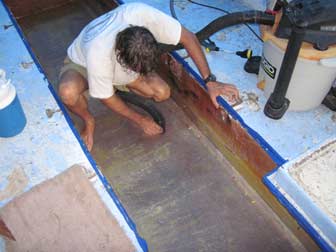
After all the materials were removed, the step I had been waiting for: a bath with cleaner/degreaser and a scrub brush! With all the smelly foam in trash bags and the compartment washed out, the boat did not stink any more.
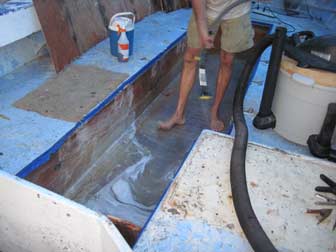
Removing the last of the water and debris from the bottom of the compartment with the shop vac. It is now ready to accept a new tank, if only we had one on hand, but that's another part of the story...

August 10, 2011
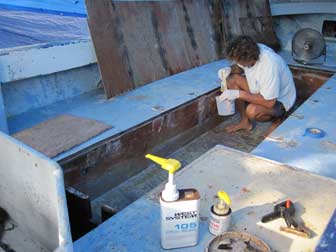
The process of ordering new tanks is still ongoing, so these holes in the boats are going to remain open for at least a few weeks. To protect the edges of the plywood deck core, they were all painted with West System epoxy.
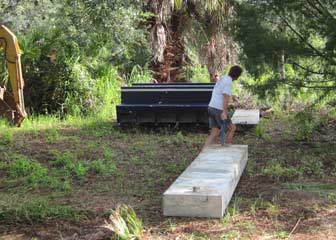
After the rest of the debris from the tank removal project was cleared away, the last step was to drag the old tank off to join the other one. We are still not sure what to do with these old tanks. They will probably just be taken to the aluminum recyclers.

August 15, 2011
Grinding and Sanding
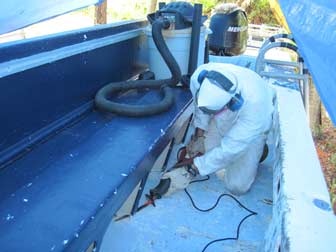
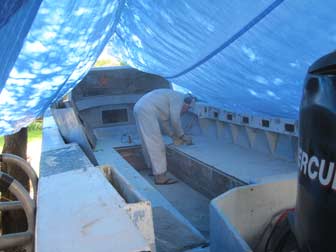
One of the ongoing debates lately has been on what to do with the deck skins. They are intact and can be saved to use again, but only with some labor. Alternatively, we can just cut them off and lay new deck skins on the boats. Usually, preserving the original deck finish is a consideration in a decision like this one, but in this case, it's the opposite. The deck skins look like they have just had bench seats cut away in the center sections, and also look like the previous bench seats, which ran along the sides of the boats, were cut away in the same manner. One lingering question was: how hard is it going to be to grind away the residual fiberglass and resin where those seats were attached? The only real way to answer that question was to grind down a test section and see how long it took. Another dust cloud emerged from underneath the tarp covering Fluke.
The results were inconclusive. Grinding out this patch did not take too long, but doing all of both decks is going to be a two day project that consumes many grinding discs. On the other hand, laying down two new deck skins is not without effort and would be more expensive.

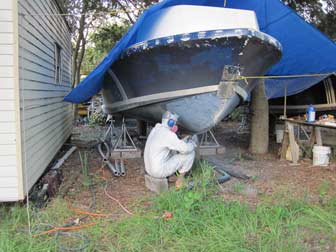
Most of the focus so far has been on the interiors of the boats, but the hull exteriors need some work too. Another question that Gene decided to address this day was how much work it would be to remove the rest of the bottom paint and prepare a few areas on the bottoms that need minor repairs. The occasional keel crunch is a hazard of work boat life around coral heads, and these boats have not been spared.
Gene tried using the grinder and the orbital sander to remove bottom paint and damaged fiberglass from the hulls. Predictably, the grinder is a lot better at taking off large amounts of material, but a bit harder to control. It is hard to leave behind a smooth surface. The orbital sander does not take off material as quickly, but leaves a nice surface behind. One lesson from this day: there is no such thing as too much protective clothing and gear when grinding bottom paint!

August 16, 2011
Grinding Hard Dodger, Gunwales, and Rub Rail Bolt Holes
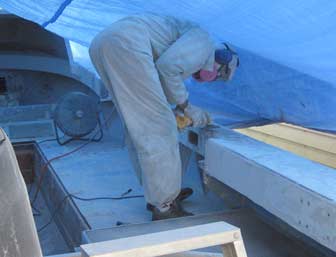
With many areas in need of attention, Gene decided to work from high to low, figuring that any time resin drips down, it will be dripping on an area yet to be worked. The fiberglass dodger on Fluke flaked off down to fiberglass in many areas under pressure washing, but some of the coating remained. Through the fog of dust, you can kind of make out Gene grinding away at those areas.
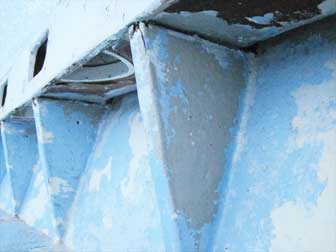
The gunwales need quite a bit of attention on both boats. On the underside, they are attached in a dubious manner to be illustrated shortly. On top, they have a variety of dings and scratches, including the previously noted backhoe scratch and the cut gunwales where the hawse pipes were missing. On the outside, the hull to deck joint has been subjected to abuse and repairs of varying quality over the years. In the picture at left, Gene is grinding away on the gunwales on Fluke.

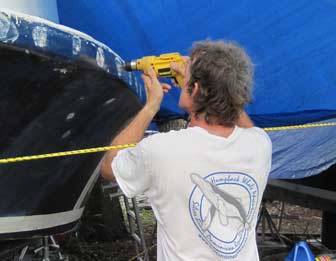
The hull to deck joint itself will eventually need the protection of industrial strength rub rails once again. Around the boats, we can see evidence that rail sections have been replaced in the past, and the evidence also shows that getting the holes to line up is impossible. The plan is to repair all of the many old holes, then drill new holes to fit the new rub rail pieces. The old holes have sealant and other gunk of the ages inside them, so Gene is using a toothy conical grinding bit on a drill to grind them out.

August 17, 2011
Grinding Gunwale Repair, Removing More Deck Skin
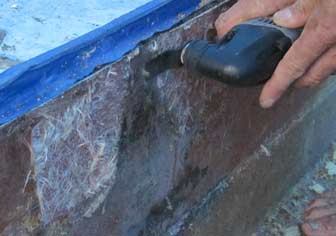
More and more grinding is the rule of the day, and will be for several days to come. Here, Gene is continuing to grind out the gunwale on Fluke.
In this area, the grinding brings out a previous gunwale rebuild/repair, with glasswork showing in the area that is used to hold the boarding ladder. That area has taken a lot of punishment over the years, much of which could have been avoided with small changes to the ladders and mounting setups.

Underneath the box structure that forms the gunwales are these gussets, which I had assumed were part of the original structure of the boat and thus would be fiberglassed in place along the tops and sides. My assumption proved only partially true: the gussets are part of the original structure, but the original structure of the old bench seats, not the current gunwale. As shown on the Privateer website, these boats originally had benches along the sides with cutouts in the gunwales to accomodate SCUBA tanks. It seems from this picture that the old tank cutouts are still in place, but have been wrapped inside the current gunwale. The gussets were originally attached with what looks like 3M 5200 along the tops, and when the new gunwale configuration was built on, they were just trimmed off. They do not seem to me to be doing much good structurally, being connected on top only by a short 5200 joint. I think we should just cut them the rest of the way off, but Gene is not quite ready to take that step without first consulting the builder.
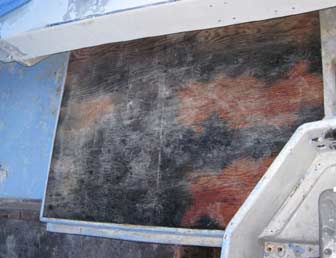
Taking a break from all the grinding, Gene removed the skin from the console/driver's raised deck on Fluke. The core shows some ugly mildew staining on top, indicating a bit of water intrusion, but the piece of plywood sanded clean nicely and sounding it reveals no rot or delamination inside. The nails are rusty and have stains around them, but look to me like they will hold for another ten years once sealed back under a deck skin.
It was on about this day that a turning point of sorts was reached in the project. We realized that we were destroying so many pieces of the boats at once that soon we would have to start putting new ones back in place. New fuel tanks with new hoses, new bilge pumps with new hoses and wiring and various other new fittings will need to be in the pipeline soon, and today Gene went out and bought a bunch of marine plywood and took a delivery of a roll of new fiberglass and a bucket of resin. The bucket says in big, bold letters, "contains styrene monomer" so that must be important information, but our reaction was, "Contains what?" Whatever it is, it is all new stuff to go in the boats, so we seem to be shifting from destruction of the old to replacement with the new.

August 18, 2011
Grinding Bottom & Deck, Diagnostic Test On Last Engine
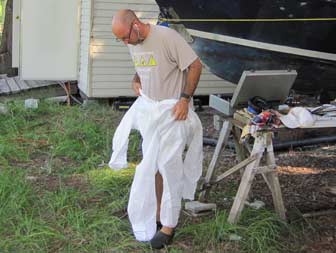
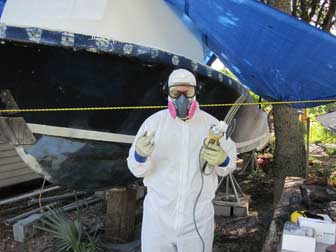
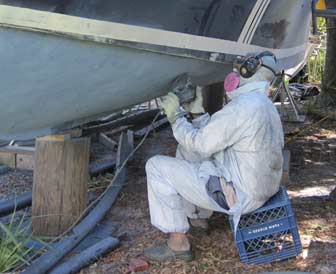
Reinforcements arrive! Hearing that Gene could use assistance with his boats, our friend Scott volunteered to come by and help. Scott is a great helper around here, chipping in when I am doing some of the sweaty farm jobs that drive most helpers away. With many square feet of bottom to cover, Gene handed him a Tyvec suit and protective gear and set him loose grinding off the rest of the bottom on Fluke.
All suited up with gloves taped to sleeves, Scott took a moment to flip me off for taking his picture before he started grinding. It's an understandable reaction, and anyone wearing a Tyvec suit in August in Florida can be excused for being a bit irrititated at the guy with a t-shirt and camera. The day before, Gene flipped off a bolt of lightning, thinking it was the flash from my camera. I have a habit of walking out to the boats and snapping his picture before he is aware I am present. I don't want to stop the work just to tell him I'm taking pictures, but understand that it can be aggravating if you are working away inside a sweaty suit and suddenly a flash goes off. I have to admit that the thought of Gene flipping off the thunderstorm cracks me up!

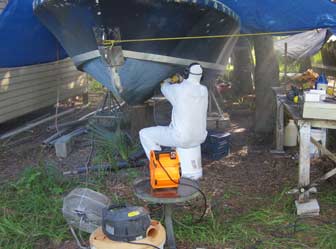
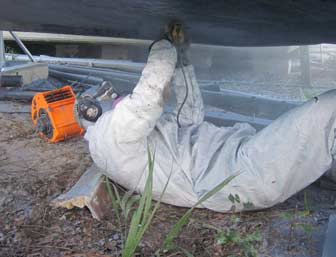
The dust starts to fly once again, driven off in the still morning air by two fans as Scott grinds away on the bottom. Doing this job without fans would be even more miserable.
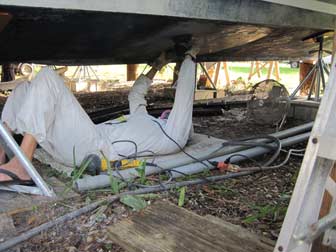
As he worked his way down the hull, Scott kept his small squirrel cage fan nearby, blowing the dust away from his head. That fan deserves honorable mention. It's a cheap one, but one day I found Scott's boy and another kid feeding wet sand into the intake just to watch the fan spit it out. Somehow, it survived that incident and continues to work well. The piece Scott is using to prop up his shoulders and head is some of the fiberglass roving that was holding the fuel tank stringers - not the best pillow!

Later in the day, Scott was polishing up after the grinding using the orbital sander. I had told Gene that he would not be afraid to get dirty, but neglected to mention that he can be hell on the equipment. Estimated lifespan of a Tyvec suit on Scott: 0.5 days before it is tattered and nearly useless.
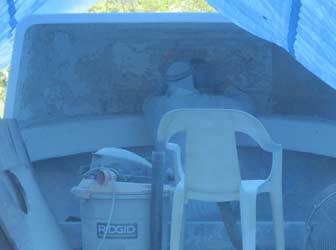
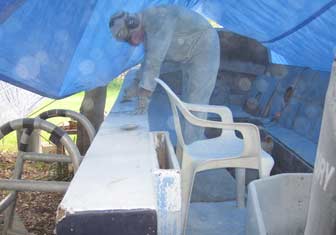
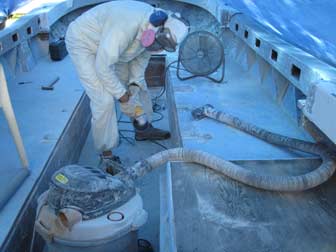
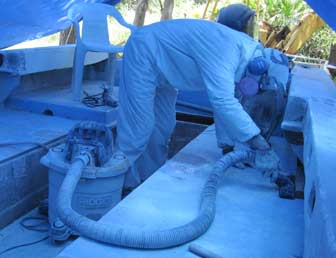
Meanwhile, Gene was busy with the grinder up in the boat, continuing to grind off the old bench seat attachments from the deck. He kept the Shop Vac hose near the work area to suck up some of the dust, but still the noise and dust being produced by the simultaneous grinding above and sanding below made me leave the area in a hurry after taking a few pictures. I got away without being flipped off this time.

I went back over to the boats when I heard the grinder shut off for a while, but the Shop Vac continued to run. I figured the area would be reasonably safe to approach without protective gear by that time, and I was barely correct. Note to self: do not sprawl your arms over freshly ground, dusty fiberglass, even if it looks pretty clean. I got itchy forearms, and not for the first time in this project.
Gene had ground out the old seat attachments and ground a section of deck out to bare fiberglass, producing an immense amount of fiberglass dust all over everything nearby. He told me that when he emptied and cleaned the Shop Vac, the filter looked like a huge piece of white cotton candy.
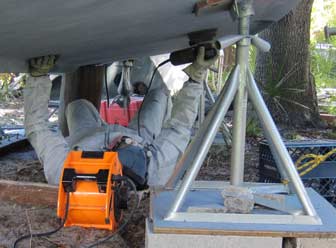
Before removing his protective gear, Gene took a look underneath Fluke where Scott had been sanding. Here he is touching up and revealing a bit more in an area that may need some work. He came out very grateful for all of Scott's hard work down there.

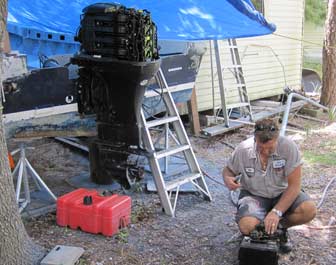
The problems with the last Mercury outboard engine persist. We had one friend's mechanic out here, but he did not have the proper computer to analyze this four stroke engine's problems. I would curse the increasing computerization of everything, but doing so on your website seems a bit too hypocritical. Gene called Dean, the guy who bought the first two engines from him, who has the right computer. He agreed to come out and check out the engine, but it turns out that whatever is affecting the fuel pump is not the only problem, or not the only manifestation of the problem. Dean hooked up his Mercury outboard diagnostic computer, but it failed to connect and got no readings at all from the engine. Here he is testing a spare starter that is among Gene's spare parts for these engines that he is selling.
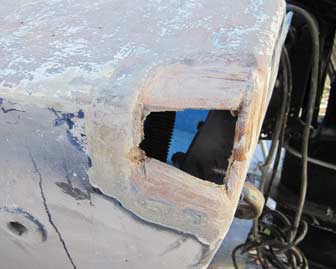
After Dean left, it was back to cutting and grinding. Gene removed the crunched port corner of Fluke, where the plywood transom and deck core had been exposed for who knows how many years. I was concerned about how much water may have migrated inside the transom, but once opened up, it looked like the core material is all in fine shape. It may be necessary to cut/grind away some more here in order to get access to properly clean up the insides and make sure the repair fully bonds.

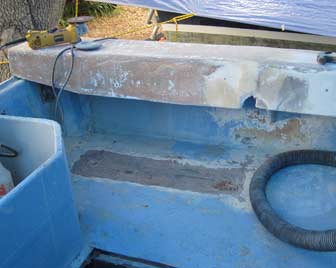
The box that held the boarding ladder onboard Fluke had corroded and frozen attachment bolts up underneath the gunwale. The easiest way to remove it was to cut it free with the reciprocating saw, slicing through the old bolts from above. After it was out of the way, the area was ground down to bare fiberglass.

August 19, 2011
Grinding Out Old Repair On Pec
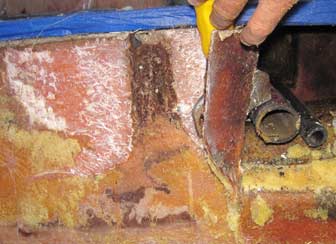
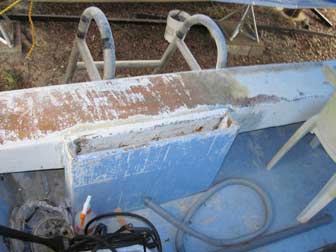
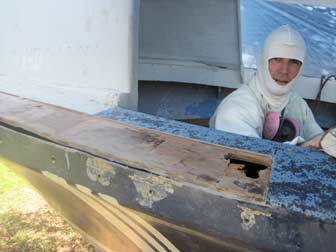
On Friday, Gene got started on the port side hull to deck joint damage. In this area, at least two separate repairs have been effected and then smashed up over time, with pieces of filler from the first repair falling down inside the lamination layers of the second repair. This is also one of the places where the metal hawse pipe disappeared at some point along the way, resulting in a hawse rip right through a couple of inches of gunwale.
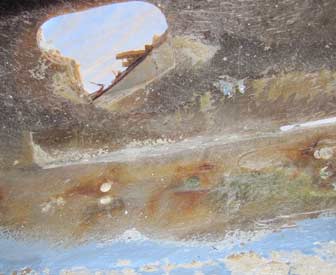
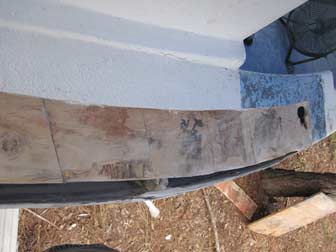
Looking at the hawse rip from the underside, I wonder how many hawses gave their lives to saw such a cut in the boat? The surprising thing to me was that the exposed plywood core did not result in water intrusion rotting out a large surrounding area. I am starting to think that the water out on the Silver Bank must have antibacterial properties, with all of these pieces of exposed core coming out OK.

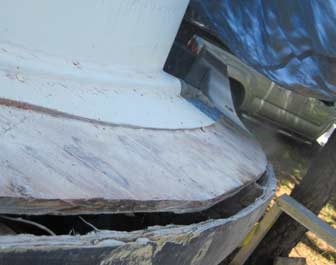
The generations of repairs along the side of the hull resulted in a couple of areas that are extraordinarily thick. This would not be a problem, but they are also not solid, as noted above. They are crunchy, and all of the previous repairs must be ground out. In the photo at right, you can see a small cloud of dust partially obscuring ground under the pickup truck as Gene is grinding away just inside the crack.
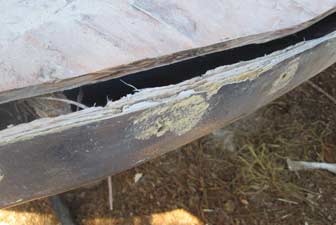
The closeup photo at left gives a better view of the many layers of crunched fiberglass and filler material from prior repairs to this long-suffering part of the boat. Some of the damage probably resulted from being battered against a dock in a storm, as previously discussed, but the sides just forward of the dodger are probably the areas of these boats most likely to be bounced against the side of the ship when in service. They use large, orange ball fenders, but sometimes a boat can manage to get around its fenders. If it does, this area or the stern corners are the parts most likely to be hit.

Access to this area is easy, if you happen to be a child gymnastics prodigy. Not so much if you are a lanky, middle-aged guy, but it is possible. Taking pictures at moments like this one is the sort of thing that might get me flipped off, if he could spare a hand.
Several hours of grinding resulted in a much thinner and less crunchy hull topsides section in this area, but it still needs some work before it will be ready to go back together.
That's all for this part, move along to Part Four at the link below.

Leave a Reply
You must be logged in to post a comment.