August 25, 2011
Repairing Holes in Fiberglass Consoles
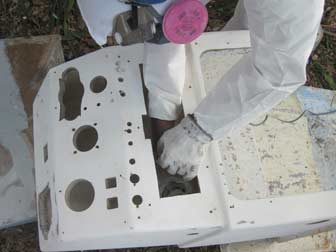
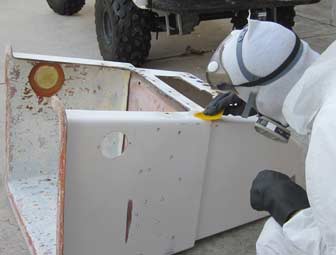
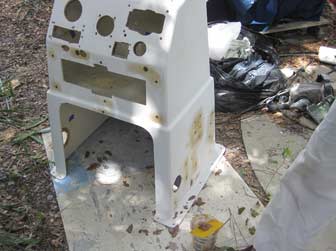
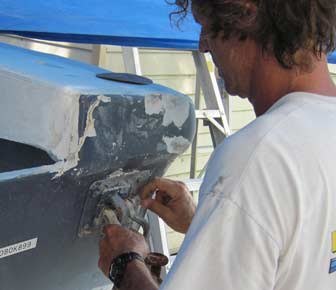
The consoles to these two boats have quite a few "extra" holes in them, the result of 3 sets of engines, at least a couple of different steering systems, and various other accessories that have been added and then removed over the years. Today's project was to start repairing the holes. The larger ones needed to have the edges ground out to blend and bond to new layers of fiberglass, while the smaller ones just needed to be cleaned up enough to fill with polyester resin thickened with Cab-O-Sil colloidal silica putty. At right, Gene is grinding out a beveled edge on one of the larger holes.
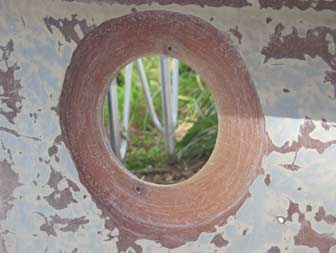
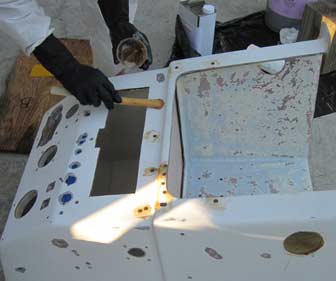
This hole has the fiberglass edge around it ground away and beveled to accept a piece of fiberglass mat layed across the inside of the hole. Smaller pieces of fiberglass will then be used to fill up the hole from the outside, then the repair can be ground smooth and faired.

The photo at right shows the first piece of fiberglass mat being laid into place across the beveled edge of the hole inside the console. This piece of mat will be the main bond between the hole and the repair.
With a wet piece of glass laid across the back side, Gene started laying smaller discs of fiberglass into the hole from the outside. These pieces were cut to fit the hole in advance, so they did a good job of filling it up. The problem we encountered was that the piece across the back wanted to bulge away a bit as the new pieces were applied. This is not really a big problem in this application. The hole can bulge a little bit inside the console without being seen or affecting anything, but still we wanted to try to improve the technique to get a repair that is smooth on both sides in other large holes.

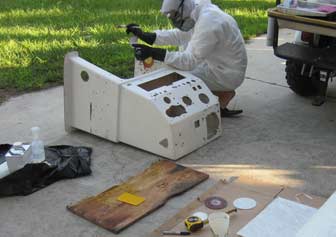
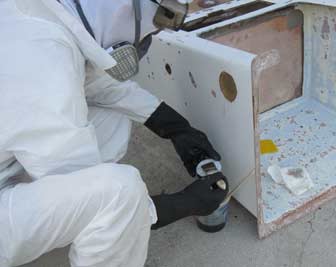
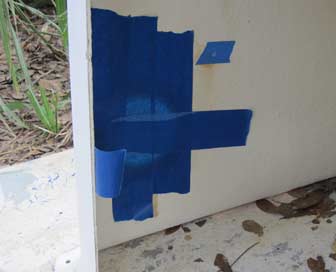
With the circles of fiberglass mat laid in place in the hole, Gene mixed his remaining resin with some Cab-O-Sil colloidal silica thickener and set to work filling in the various small holes where switches and screws had been. Cab-O-Sil, which I think I'm just going to spell "cabosil" from here on out, makes a thick, workable putty that is easy to apply into a hole and then smooth with a plastic spreader. To prevent large amounts of material from simply slipping through, we made a temporary backing behind some of the medium sized holes by taping some wax paper behind it with blue masking tape.
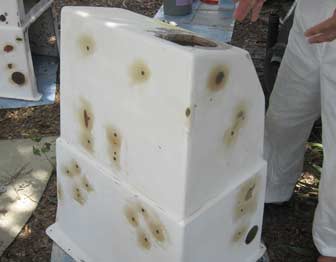
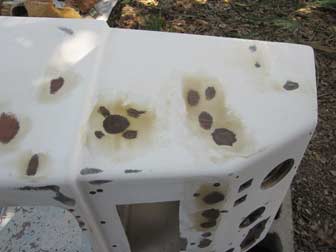
It is impossible to see in these pictures, but the gelcoat and a bit of fiberglass around these small holes has been beveled out a little bit to allow a smooth and strong bond. Pulling the thickened resin over the holes with the plastic spatula makes an acceptably smooth surface, easily sanded away to be completely smooth to the touch. These consoles will be painted or coated with gelcoat and most of these repairs will be invisible when that is done.

August 26, 2011
Continuing Console Repairs and Testing Hard Top Laminations
Our experience the previous day with handling a brand new roll of fiberglass chopped strand mat taught us that it is heavy, unweildy, and prone to shedding lots of fiberglass all over the handlers and everything else. We needed a new way of dealing with the roll, and I recalled seeing a clever solution recently. It is visible in the August 8th entry. The warehouse where we have been building floating docks for the upcoming IFDS Disabled Sailing World Championships is really a local sailor's "man cave," in which he builds and modifies various boats, mostly small multihulls. Overhead, there are garage door tracks running the length of the warehouse, and he has built a contraption to hold several rolls of fiberglass products, allowing them to roll along suspended by that track from above. The result is, the appropriate roll of fiberglass can easily be placed directly over the desired spot, then moved out of the way when not needed, all without having to lift it or worry about contaminating it on the ground.
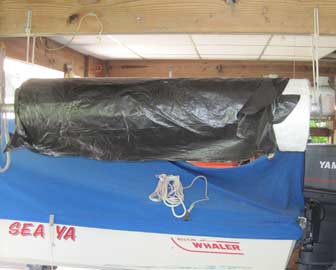
We did not need anything that fancy, but being able to just hang the roll in one place and roll off fiberglass as needed was an appealing idea. We just took a large aluminum tent pole, put it through the roll, and hung it from an overhead beam underneath my office. It is not in the way any more, my dogs will not shake mud on it, and best of all, we do not ever have to pick it up and handle it again.
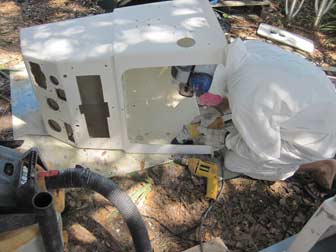
Once the roll of fiberglass mat was hung in the air, Gene set to work preparing all the holes in the other console for repair. I no longer remember which console went with which boat, and am not sure these will even go back onto the boat from which they came. They might be switched along the way, so this could be the console for Fluke or Pec.
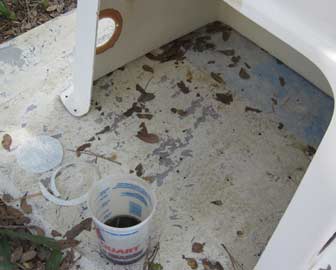
Once the holes were ground out and edges beveled, we decided to try a little experiment. We wondered whether polyester resin could be mixed in one of those red plastic disposable drink cups. For those of you wondering the same thing because you have a huge triple stack of those things from Sam's Club, the answer is not really. You can do it, but it dissolves the cup. Back to real mixing cups!

On both consoles, the larger holes for the steering wheel, engine controls, tachometers, ignition switches and other things are in the top panels of the console. Those areas are cored with plywood and will be dealt with later. The holes we are filling are in areas built only of fiberglass. There are quite a few of them, considering these are fairly Spartan work boats.
The holes on the port sides of the consoles, including the larger ones that require a bit of mat to repair, have to do with the side-mounted throttles on the original Honda engines. You can see them on the Privateer website in an old photo of one of these boats. I am not sure why there are so many holes on the front side of the console.

These boats both had aluminum frame tops with Sunbrella fabric stretched over them. The frames are being replaced, and a few different options have been under consideration for the actual shade part of the top. Replacing the canvas covers is one alternative, but canvas wears out in the tropical sun. Gene would prefer some kind of hard top, so we looked into sheets of fiberglass, sheets of plastic, and a few other things. All have drawbacks, and nothing available was quite right. The finish was wrong, the sizes were inconvenient for the space to be filled, the price was too high, and neither of us really trust plastics that claim to be UV stabilized. The tropical sun eventually turns all such products into plastic dust. I guess the dust is UV stable, but that is not really helpful.
We decided that all we really need is a couple of thin sheets of fiberglass measuring about 7 by 9 feet. It will be well supported by the aluminum frame, and is not a place where people will ever walk, so it need not be very thick or strong. We figured that with a big roll of fiberglass mat and a bucket of polyester resin, we should be able to manufacture our own fiberglass hard tops for the boats. We would just need a flat area of sufficient size and a way to remove the sheet from that area once it is layed up and cured.
We also had a couple of unanswered questions about the fiberglass and additives obtained from Fiberglass Services in Sarasota. At their recommendation, Gene bought a gallon of "Sanding Aid" to add to the fiberglass resin. On the can, it says it contains styrene monomer, and should be added to resin for a tack-free cure. I'm not sure what styrene monomer is, perhaps a fancy name for wax, but this stuff is supposed to allow hardening of resin or gelcoat in the same way that wax does. That raised the question: would this resin cure up tacky without this stuff, but hard with it? That would be really useful, if true, so we decided to run a test.
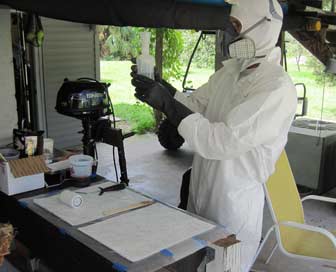
Our test concept was to lay up a couple of small pieces using wax paper as a release material and a spare work bench as a flat surface. One piece would be layed up with two layers of mat and resin not containing the Sanding Aid, the other piece would be identical, but would have the recommended amount of Sanding Aid in the mix. We hoped to learn whether or not the wax paper would work to prevent the resin from sticking the sheet to the work bench, and how the styrene monomer Sanding Aid worked.
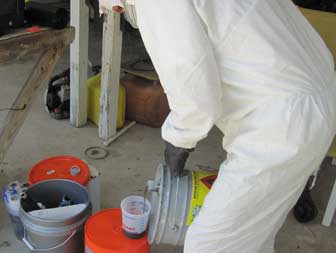
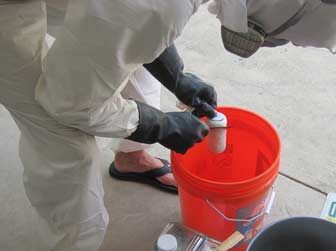
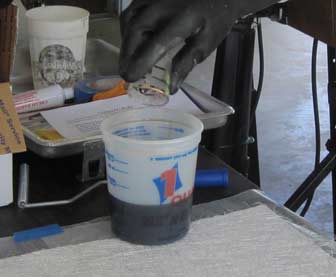
In the above picture, Gene is using a measuring dispenser to get the right amount of hardening catalyst for our test. In the one at left, he is pouring polyester resin from a 5 gallon bucket into a mixing cup. Both of these measurements are prone to some error, which is magnified when mixing small amounts. It is not easy to pour the resin from the bucket without spilling a bit, so this job is best done with cleanup materials at hand, and in a place where a spill will not be a disaster.

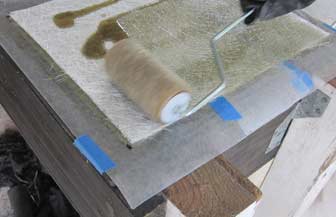
This picture shows the second layer of fiberglass mat being laminated onto the first. We decided to use only two layers for this test, both to conserve materials and to see whether or not it would produce a piece that seems thick and strong enough to serve as a hard top. One lesson learned here is that it helps to have someone around with clean hands while you are doing something like this. Once the first layer was wetted out, I placed the second one on top. Grabbing it and positioning it accurately would not have been as easy for Gene, wearing his chemical resistant gloves coated with polyester resin. We were wondering whether the piece underneath would want to slide around on the wax paper as the resin was rolled into the second layer of mat. It did not. It stayed there as if glued to the table.
With the first test pieces of mat laminated together, Gene cleaned the resin out of his roller in preparation for the lamination mix that includes the "Sanding Aid" material. Until this point, the paint roller tool has primarily been used to scrape and dig out foam and rotten wood. It's good for those jobs, but nice to see it being used to create something rather than tear it up.

When we got to the part about adding the styrene monomer "Sanding Aid" to the mix, we had a bit of a problem. We did not have any more chemical-resistant measuring devices. I briefly considered raiding the kitchen for one of my wife's measuring cups, but thought better of it. I'm not sure those are chemical resistant either, and was not eager to explain ruining one to her. We ended up using a non-resistant measuring cup to measure out the appropriate amount of water, poured that into an old "Dead 'Til I Gets Me Rum" shot glass, then marked the side of the shot glass with a Sharpie marker. Here Gene is pouring the "Sanding Aid" out of our improvised measuring cup.
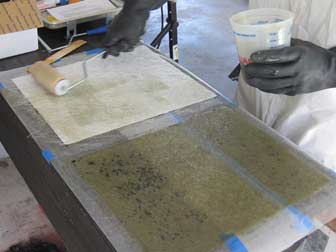
The picture at left shows the second layer of mat being wetted onto the first lamination of mat with the wax stuff added to the resin. With a bit of extra resin on the bottom layer, Gene just rolled this piece a bit to soak it up into the second layer before adding more to finish wetting it out.
By this time, it was impossible to ignore the fact that little black spots were showing up through the first lamination we had made. It looked like the resin had made it through the wax paper. I started to wonder whether I would have two cool new protective shields permanently stuck to my work bench, or worse, two partially cured messes on my hands. Oh well, it's just a piece of plywood, and I did not really care if I had to throw it out and make another one. The two pieces were left to cure while we moved along to use up the excess resin from the second batch on console repairs.

After our first repair of the larger hole left by control cables in the side of console number one resulted in an inward bulge of the repair area, we decided to try a different technique this time around. The repair began in the same way as the previous one - with a bevel ground out around the hole and a piece of fiberglass mat cut to mostly fill that beveled area.
The addition to our technique was to provide some support to the repair from behind by taping a piece of wax paper over the piece of mat layed across the inside of the hole. With that piece taped in place, we could lay the console down on its side and put in a few more discs of fiberglass mat without worrying about the area bulging out.

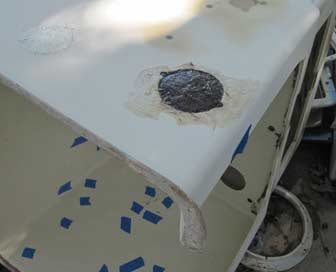
Here is a shot showing the repaired hole with a few fiberglass discs laminated in on top of the backing disc that was put in from inside. It looks like our wax paper backing technique was, if anything, a bit too effective. The repair bulges up above the surrounding surface a bit, and will have to be taken back down with a grinder.
The spots of blue tape scattered around inside the console are backing for cabosil putty repairs of small holes. On the other console, we just let the thickened resin push on through to the inside, so there are a bunch of little bumps inside that console at the site of each filled screw hole. These really won't affect anything, but we decided to try this method of eliminating those to see how well it might work in an application where it really matters.
There was still a little resin in the pot after the large hole was laminated, so Gene mixed it up with some Cab-O-Sil thickener and spread it on a few holes that were not quite smooth after earlier fairing.

August 27, 2011
Preliminary Results of Fiberglass Lamination Tests
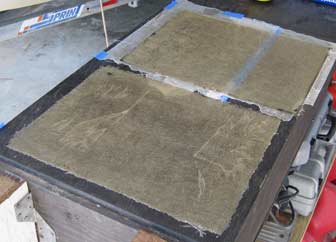
When we returned to the test sheets of fiberglass we had laminated up the day before, the test results were mixed. There was a lot of good news. Both pieces cured, and we do not have to throw away my work bench top. The pieces are very strong, and confirmed our suspicion that two sheets of mat stuck together would be almost strong enough to be suitable as a hard top. We now believe three sheets laminated together will work well.
The test of the styrene monomer "Sanding Aid" product delivered mixed results. The two pieces cured in the same way on top. We were expecting the piece without the sanding aid to remain tacky, ready for another layer without further preparation. It did not. They both cured up hard and slick on top. The interaction with the wax paper was affected, however. The picture was taken after the sheet without sanding aid had been pulled up and the wax paper peeled from the back. As the photo shows, the peeling did not go all that well. Some wax paper remained firmly stuck to the back of the new lamination.
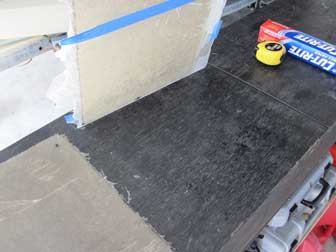
In both test pieces, the resin got through the wax paper in small spots, sticking the sheets to the table. In the picture at left, I have lifted one sheet up, showing the shiny spots of resin on the table top. Both pieces lifted away easily and the little bit that soaked through will not matter in our real application, which will be done on the floor of a shed. The piece with the "Sanding Aid" added to the resin did peel away from the wax paper more easily than the other one, but still some wax paper remained stuck. We have to figure out a way to make it not stick or a way to remove it easily, or we will have to use something else as a release/barrier between the floor and the new hard tops.

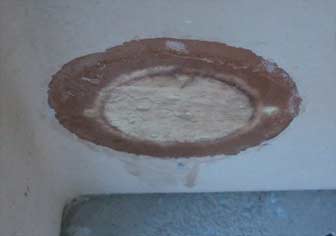
The test on our revised technique for repairing the larger holes was a success. The wax paper supported and held the piece of mat spanning the hole flat. It will be easy to grind and fair it smooth from this point. This was not an easy subject to photograph and I should have wiped the water spots from the outside of the repair before shooting. Still the technique worked, whether or not my photo shows it very well.

August 28, 2011
Removing Miscellaneous Hardware, Odds and Ends
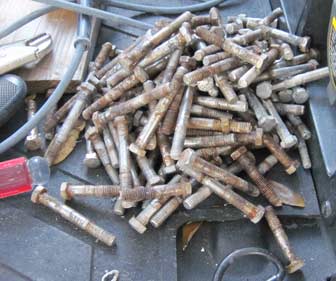
Although the boats have been mostly stripped of hardware, a few items still remained on the tear down list, and many of those were dealt with today. To start out, Gene gathered up all of the heavy duty rub rail sections and removed the stainless backing strips and stainless bolts, organizing them all into piles.
The process produced quite a pile of stainless steel bolts of various lengths. This photo provides a good illustration of why they call it stainless steel and not stainproof steel. There is iron in it, and iron plus salt yields rust. Stainless steel protects the iron to an extent, but not completely.

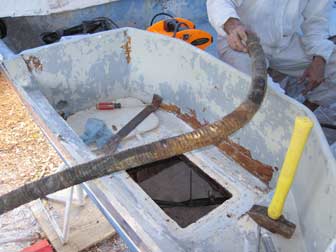
Today's entry in the "extremely scary discoveries" category was this fuel fill hose. In the worst spots, there was not much left. The steel windings in the hose had completely rusted through and the rubber was not in much better shape. It made disturbing crunching sounds when bent. It looked to me as if bouncing the boat along in some chop could shatter it. Gasoline fill hoses on the verge of shattering definitely fall into the extremely scary category.
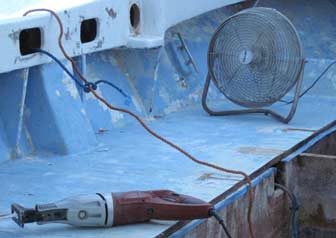
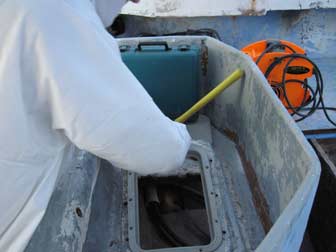
Before pulling out the scary fuel fill hose and the old fuel vent hose, Gene attached a couple of messenger lines to them to allow us to pull the replacement hoses under the deck and up the side of the boat. Walking by outside the boat and seeing a piece of rope coming up out of the fuel fill fitting made me look twice. Not something I had seen before, and it took me a second to realize why it was there.

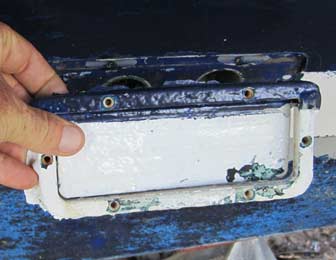
The watertight deck hatches in the motor wells of both boats were removed. One motor well was modified in the past, and the hatch replaced. The other appears original. Both of these will be replaced, and the unmodified motor well will probably be built up like the other one to improve drainage.
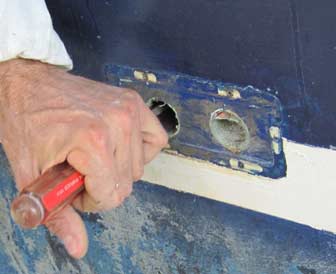
The cockpits of these boats are self-bailing through twin 1.5 inch drain scuppers on each side, and all four pairs of holes had hard plastic scupper flappers installed. For those not familiar, this is just a swinging "door" made of plastic, and it only swings outward. Waves lapping against the stern can not splash straight up onto the deck, but water on deck can push the lightweight plastic flapper out of the way and drain easily. These are in pretty good condition, and could be reused if not for the paint. They are inexpensive enough to make paint removal not worthwhile, so they will be replaced.

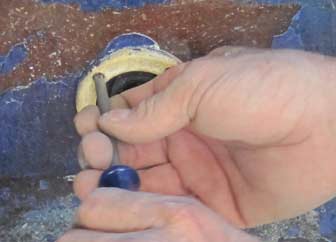
The brass scupper liners were corroded away pretty badly. I would guess these are original to the boats, and while some were in better shape than others, in this pic you can see that the one on the right has corroded all the way through in a small spot at the bottom. Since they were almost gone already, removing them was fairly easy. Just put a screwdriver under an edge, whap it a couple of times, and the piece folds and bends inside the hole. It can then be twisted around until free and extracted.
As mentioned, the motor wells of these two boats are slightly different. On Pec, the motor well just drains through a hole in one side placed near a pair of the overboard scuppers. I believe the deck is the original, and it looks like the boats did not have motor wells when they were built. These were added along the way. On Fluke, the motor well deck has been built up another inch or so above the original, and there is no drain onto the cockpit deck. Instead, it has two motor well scuppers, both with rubber scupper flappers. In the photo at left, one of those scupper flappers is being removed in preparation for sanding the hull topsides.

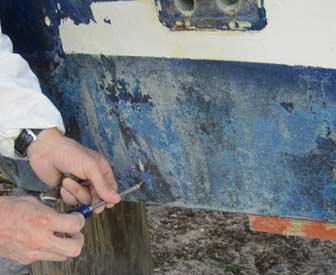
Hanging out of the transom of Fluke was this lone screw, probably a relic from a past speed or depth transducer installation. A couple of nearby holes have been filled in the past, but this screw was just left in place. The bottoms of the boats are being sanded soon too, so it is time for this one to go.
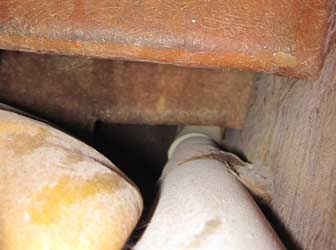
There are PVC pipes installed as conduits on both sides from the bottom of the bilge leading out to the sides of the boats, then turning upward through the deck, where they are glassed in place. Fuel supply hoses, bilge hoses, and bilge pump wiring runs through these. On Pec, there is another PVC pipe that runs vertically through the driver's deck next to the bilge conduit. We were wondering whether we could fish bilge pump wires through that pipe, leaving the main conduit open for hoses. Not knowing exactly what was in the way down there, we were speculating about various methods when it occurred to me that we could at least get a bit of a look down there by sticking my camera inside and shooting blindly along the conduit. The flash illuminated the area, and we learned that there are a couple of stringers and a bulge of foam obstructing the path, but fishing a wire looks possible, if not easy.

August 29, 2011
Pondering Removing Gussets, Replacing Large Shackles, Scott Grinds Bottom More
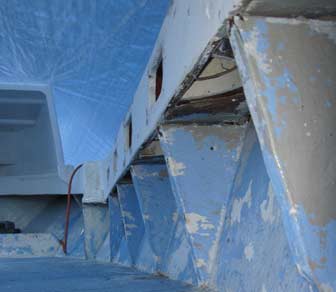
When the original bench seats along the sides of these boats were cut away, they were not cut back flush with the inside of the hull. Instead, they left these gussets along each side. When the gunwale was wrapped around the inside of the former benches, they rested the interior panel on the tips of these gussets. My reaction to them was, "Let's cut them out and make the sides easier to finish!" Gene was not quite ready to start chopping off parts of the boat that might be structurally important without consulting the manufacturer and gathering a few more opinions. Other than making the sides slightly stiffer in one direction, I did not consider them structurally significant because the tops of the gussets are not really connected to anything in a structural way. There is 5200 or something along the tops of them, which is a strong connection, but not really a structural one in my view. Others had a visible gap at the top. Out at the gusset tips, it does not appear there was ever a joint held by anything more than gravity, and rot has taken its toll on some of those tips. If these pieces had been tabbed with fiberglass cloth along the tops, I would have been convinced they should stay, but my feeling was that they have not really been connected to anything in years, and are mostly decorative. And in the way.
Gene was not buying my argument, and these are his boats. He said he would call Privateer, where a lady who has been there for a long time has been very helpful in answering his questions about these boats. I agreed to ask a marine surveyor who I know and trust, but did not get around to it before Gene got an answer back from the factory. They said they make the boats without any benches at all and the sides are plenty strong, so we can cut these off.
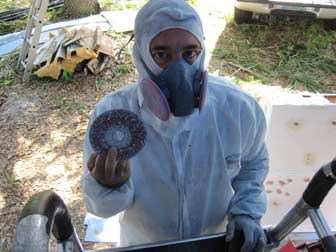
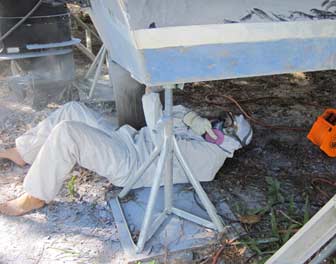
Scott came by to help out with grinding down the bottoms of the boats again. He had his usual reaction to being photographed.

It is good to have friends who will come by and help with the really difficult and unpleasant jobs, and grinding the bottoms of boats is a leader in that category. Scott is a hard worker, and even though concentrating on the task at hand, he had the presence of mind to notice my presence and greet me properly without missing a beat.
While Scott ground away, Gene was taking inventory and evaluating old parts for reuse in anticipation of some shopping for replacement parts. Figuring out what can be reused and what will be needed is one problem, locating the needed boat parts at the best price is another. A list is needed, then a great deal of comparison shopping.
A good example is the large shackle being removed from the stern towing eye in the picture at left. These boats are towed on two heavy lines each, and each tow rope has a shackle that connects to another shackle on the bow and stern eyes. It adds up to quite a few large shackles, some of which are in good condition, some rusted beyond usability.

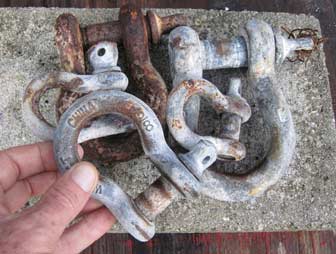
This is a collection of some old towing and anchor rode shackles, a few will have to be cut free from the boats, as they are frozen in place. The large one in my hand is a 5/8 inch one, and the larger one on the table is a 3/4 inch. Gene's first thought was to replace any bad ones with 3/4 shackles, but we discovered that some of the bow towing eyes will accommodate the 3/4 shackle, while others are a bit smaller and will only take the 5/8 one. We will have to enlarge holes to make all of them accept the big shackles if they are to be interchangeable.
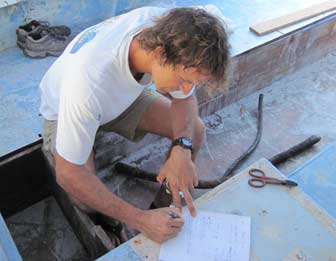
These are fairly simple, open boats, and a great deal of the hardware can be reused, but it is still surprising how many little things there are to rebuild and replace. Deck plates and hatches, shackles of various sizes, hawse pipes, bilge pumps, batteries, switches, navigation lights and a pretty long list of other marine hardware will be needed. The picture at left shows Gene assembling that list in his "office" on board Pec.


Leave a Reply
You must be logged in to post a comment.